
2011-2017 BMW X3 F25 How to Add Brake Fluid DIY
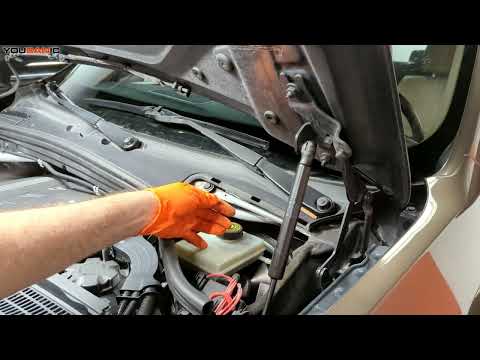
About this video
Adding brake fluid to a 2011-2017 BMW X3 F25 is a relatively simple process. Here’s a guide to help you through it:
Tools/Items Needed:
Brake fluid (DOT 4 specification recommended)
Funnel (optional)
Clean cloth or paper towels
Instructions:
Prepare the Vehicle:
Park the vehicle on a flat surface and engage the parking brake for safety.
Ensure the engine is turned off and the vehicle is cool to the touch.
Locate the Brake Fluid Reservoir:
The brake fluid reservoir is typically located near the firewall on the driver’s side of the engine bay.
It is a translucent plastic container with a cap labeled “Brake Fluid.”
Check the Fluid Level:
Before adding brake fluid, visually inspect the current level in the reservoir.
There are minimum and maximum marks on the side of the reservoir indicating the acceptable range. The fluid level should be between these marks.
Clean the Reservoir Cap:
Before opening the reservoir, use a clean cloth or paper towel to wipe any dirt or debris from around the cap.
This prevents contaminants from entering the brake system when the cap is removed.
Open the Reservoir Cap:
Unscrew the cap from the brake fluid reservoir by turning it counterclockwise.
Some reservoir caps may have a tab or latch that needs to be pressed or lifted before the cap can be removed.
Add Brake Fluid:
Using a funnel (if available) to prevent spills, carefully pour brake fluid into the reservoir.
Add fluid slowly and stop periodically to check the level against the marks on the side of the reservoir.
Do not overfill the reservoir; only add fluid up to the maximum mark.
Close the Reservoir Cap:
Once the fluid level is at the appropriate level, securely screw the cap back onto the reservoir by turning it clockwise.
Ensure the cap is tightened snugly to prevent leaks.
Final Checks:
After adding brake fluid, visually inspect the area around the reservoir for any signs of leaks.
If any brake fluid was spilled during the process, clean it up with a clean cloth or paper towel.
Test the Brakes:
Before driving the vehicle, pump the brake pedal a few times to ensure proper brake system pressure.
Check for a firm brake pedal feel, which indicates that the brakes are functioning correctly.
Adding brake fluid is an essential maintenance task that helps ensure the proper operation of your vehicle’s braking system. If you’re unsure about any step or encounter difficulties during the process, consider consulting a professional mechanic for assistance.
In this detailed DIY tutorial, we based on a 2011 BMW X3 equipped with a 3.0L gasoline engine and automatic transmission. This guide is applicable to BMW X3 models from 2011 to 2017 (F25 series).
For a detailed list of required tools and parts, and additional support, visit our website at youcanic.com.
Need More Help?
If you have any questions or need further assistance, don’t hesitate to reach out through our website. At YOUCANIC, we provide comprehensive resources to help you with your vehicle maintenance needs.
Subscribe for More DIY Car Maintenance Videos!
Don’t forget to like, comment, and subscribe for more step-by-step automotive repair tutorials. Happy wrenching!