Hyundai Front Brake Pads & Rotor Replacement
Are the brakes of your Hyundai weak and soft? Learn how to fix the problem by replacing your vehicle’s front brake pads and rotor. This guide provides instructions on changing a Hyundai vehicle’s front brake pads and rotors.
The videos and pictures are from a 2013 Hyundai Sonata. These instructions should still help you replace the brake pads on other Hyundai models such as Accent, Santa Fe, Sonata, Tucson, etc.
What you will need
- Hyundai Front Rotor Brake Pad Set
- 10-17mm Metric Sockets
- Ratchet
- Torque Wrench
- Flathead screwdriver
- Jack
- Jack stands
Procedure
How to change front brake pads and rotors on a Hyundai.
- Set the parking brakes and place the transmission in Park.
2. Open Brake Fluid Reservoir. Start by opening the hood and removing the brake fluid reservoir cap. This is necessary and will allow you to press the caliper pistons. You must do this to fit the brake caliper’s new brake pads.
3. Loosen Lug Nuts. Before you raise the car, make sure to break loose the lug nuts. Please do not remove them yet; loosen them.
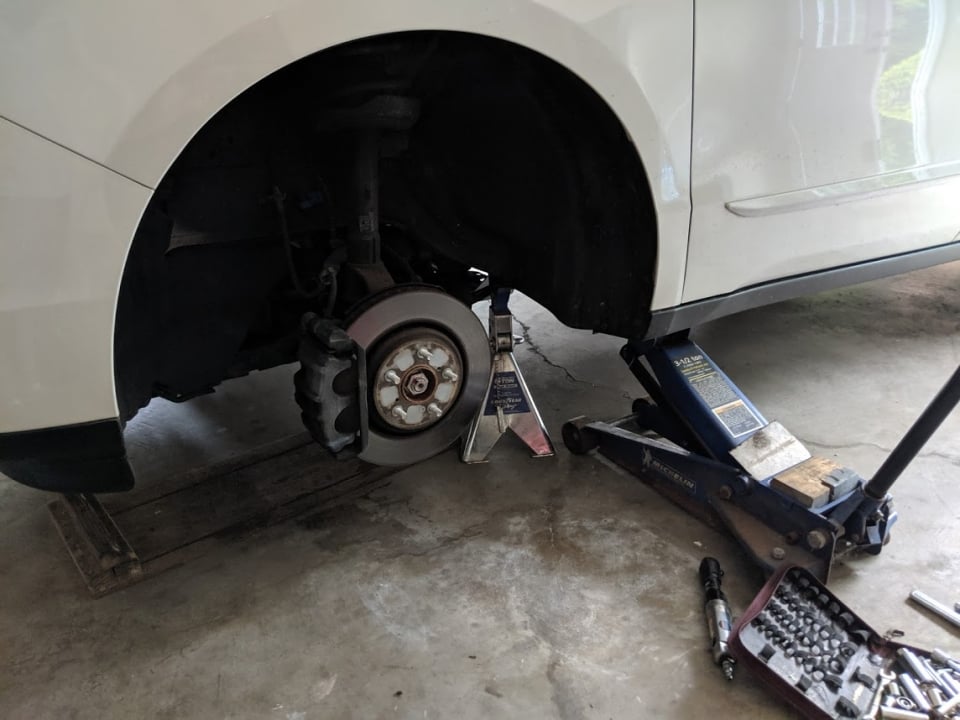
4. Raise Vehicle. Use a floor jack to raise one of the front wheels. Carefully raise the front of your car with a jack and then support the car with jack stands.
5. Remove tire. Remove lug nuts and keep them safe so you don’t lose them. A secure vehicle with jack stands. Always secure the vehicle with jack stands. Don’t rely on the hydraulic jack alone.
6. Remove Brake Caliper Bolts. Locate the two bolts on the back of the front brake caliper. Remove both bolts. Use a 14mm socket and a ratcheting wrench to loosen the lower and upper caliper bolts on the caliper’s back and pull each bolt slightly out. You need to slide them out to allow room to remove the caliper. Secure the caliper.
7. Remove the Brake caliper. Use a wire to secure the brake caliper. Do not let the brake caliper hang, as this can cause damage to the brake hose. Lift the caliper off the brake pads and tie it with a rope to the strut to keep it from falling and void, putting tension on the brake line.
8. Remove Brake Pads Once you remove the two bolts, you will pull out the caliper and remove the brake pads. Loosen the two rotor retaining bolts using a Phillips screwdriver. These bolts can be difficult to come out of and require that you use a Hand Impact Tool Set.
9. Remove Caliper Bracket – Before removing the rotor, remove the caliper bracket carrier. It is held in place with two bolts. These are 17mm bolts. Remove the bolts using a breaker bar.
10. Remove the rotor – Removing the old rotor can be tricky. Remove the screw that holds the rotor secure. Next, you need to remove the rotor. Try wiggling the rotor back and forth. If the rotor does not come loose, you may have to use a hammer to get it off. Spray penetrating oil and let it sit for 10 minutes before you try to remove the rotor.

11. We recommend cleaning the bracket with a steel wire brush before installing the new pads. Compare the old and the new rotors to ensure they are the same size.
12. Install the new rotor. Carefully fit the new rotor. If you install new slotted rotors, ensure they are fitted correctly to spin in the proper direction. Tighten the rotor retaining bolts.

13. Next, install the bracket and tighten the two bolts on the back. Remember, the bolts on the back of the brake pad bracket must be tight. If you use a torque wrench, torque them at 70 ft-lbs.
14. Clean. Using a dry towel or a rag, you can clean the dirt from the calipers and the pistons with a special spray for cleaning brake parts.
15. Install the new brake pads. The new brake pads will probably be thicker than the older ones; you must use an even surface (e.g., the old brake pad) to press back the caliper pistons to fit the new brake pads inside the brake calipers.

16. A C-clamp can be used to compress the pistons backward. Don’t push the pistons too far until the pistons are in line with the rubber dust boot. Put the new brake pads in their place; make sure they are tight and well-fitted.
17. Reinstall the brake caliper. Ensure the dust boot clears the brake pads to avoid tearing. Tighten the two caliper bolts to the specified torque below.

18. Refit the front wheel. Tighten the lug nuts in a criss-cross pattern. Lower the vehicle until it puts weight onto the wheel to prevent it from spinning, then complete tightening the lug nuts to specification.
Torque Specifications
- 14 mm caliper guide bolts: 20 lb-ft.
- Brake Caliper Retainer / Bracket: 70 lb-ft
- Lugnut bolts: 85 ft-lb
We hope you find the Hyundai Front Brake Pads & Rotor Replacement guide helpful. For more help with your Hyundai, check out the Vehicle Repair Guides section.


85 ft/lbs on the lug nuts.
Instructions for well done. The only thing is the caliper guide pins are 14 mm, not 17 mm. The only other thing is it would have been nice to provide the torque spec for the lug nuts when finishing up. Thank you!