
Mercedes 722.9 7-Speed Transmission: Check Fluid Level
Reviewed/Verified by:

Do you need to check your Mercedes-Benz transmission fluid level? Following the procedures below, you will learn how to do so without a dipstick.
At a Glance
- There is no dipstick and no separate fill plug. An overflow standpipe inside the pan sets the level. You check and fill through the drain plug opening, and the level is correct when fluid stops running and only drips.
- Check at 45 C (113 F) fluid temperature. ATF expands as it warms. Check it cold and the level reads high, so you drain out fluid the transmission needs. Check it hot and it reads low, so you overfill.
- There are two fluids and they are not interchangeable. Built on or before 21 June 2010 takes red, MB 236.14. Built 22 June 2010 or later (7G-Tronic Plus) takes blue, MB 236.15. How to tell which you have is below.
- Total capacity is about 9.9 liters (10.5 US quarts). A drain and fill moves roughly 5 quarts of that, so this is a partial change, not a flush.
- Time and cost: about an hour on a level lift or four jack stands. Roughly $60 to $140 in fluid for a level correction, or $350 to $600 for a full service at an independent shop.
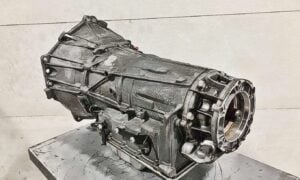
This guide provides instructions on checking the transmission fluid level on the Mercedes-Benz 722.9 transmission, also known as 7G-Tronic or NAG2.
No dipstick on the 722.9 will allow you to check the transmission fluid level. On the 7-speed transmission, you check the fluid level using the overflow method. An overflow pipe is on top of the drain plug inside the transmission. The height of this pipe is used to ensure the correct transmission fluid level.

🔧 Find out what is actually wrong before you pay someone to guess
Dealer level diagnostics at home with the YOUCANIC UCAN-II Pro.
- ✔ Covers most makes and models, including many luxury brands. Send us your VIN and we will confirm your car before you order
- ✔ Reads every module, not just the engine, so you find the faults a basic reader says are not there
- ✔ Commands the car: test a fan or pump, bleed ABS, retract an electronic parking brake, register a battery
- ✔ No subscriptions. Free lifetime updates, so the price you pay is the whole price
- ✔ Backed by real mechanics in the USA you can email before and after you buy
Featured in The Wall Street Journal
What you will need
- Transmission Fluid ATF 3353
- A001 989 45 03 10
- 722.9 Transmission Adapter
- Drain plug washer 007603012102
- Fluid transfer pump
- Allen key socket set
- Socket wrench
- IR thermometer
- Oil drain pan
- Torque wrench
- Work gloves
- Floor Jack and Jack Stands
Procedure
Checking the transmission fluid level requires the transmission to be at a precise temperature; warm it up by taking your car for a 10-minute drive.
- Raise the vehicle on all four wheels and make sure the vehicle is level.
 The easiest way to do this is on a lift. If you can’t access a lift, lift both the car’s front and rear sides. Secure the vehicle on jack stands, ensuring it is leveled and sits securely.
- Remove the whole splash guard under the transmission.

 You will need an 8mm socket to remove the screws.
- Locate the drain plug at the bottom of the transmission pan.Break it free using a 6mm Allen key, but don’t remove it yet.
- Position a drain pan underneath the drain plug.
- Climb into the car, turn on the engine, and check the transmission temperature using an IR thermometer. Point the thermometer at the transmission oil pan. You can also check the transmission oil temperature with an advanced diagnostic scanner.
- With transmission temperature at 45 °C, push the gearbox lever through P-R-D and back several times.
- Go back underneath the car and remove the drain plug. Carefully observe what happens.
• If nothing flows out: the fluid level is too low, go to step 9
• If there is a strong and continuous flow: fluid level is too high, skip to step 12
• If oil drips in small quantities: fluid level is correct, skip to step 13 - If the transmission fluid level is low, fill the transfer pump with 1 liter of transmission fluid.
- Place the filler adapter into the drain plug, connect the pump hose, and open the valve. Pump about 0.5 quarts and then close the valve.
- Disconnect the filler adapter and allow excess fluid to drain until only a small amount drains. If no transmission fluid drains out, add more and repeat the process as needed.
- Wait until the excess transmission fluid drains until the flow is minimal.
- Reinstall the transmission drain plug and tighten it to 17 lb-ft using a torque wrench.
- Reinstall all remaining parts.
 The easiest way to do this is on a lift. If you can’t access a lift, lift both the car’s front and rear sides. Secure the vehicle on jack stands, ensuring it is leveled and sits securely.

 You will need an 8mm socket to remove the screws.

 Break it free using a 6mm Allen key, but don’t remove it yet.

 Carefully observe what happens.
Most Mercedes cars made after 2005 use a 7-speed automatic transmission, called 7G-Tronic or NAG2. The 722.9 transmissions were installed in European vehicles around 2000, while in the US, it was installed on most 2005 and newer models.
The Mercedes-Benz 7-speed transmission is a superb gearbox with improved performance, shorter shift times, and fuel economy.
Many car owners find checking the transmission fluid level inside this transmission troublesome, as there is no dipstick.
Application
Mercedes-Benz 722.9 transmission was available in a few different US models as early as 2004, and in Europe, it was available in the C-Class as early as 2000.
- SLK (R171 starting in 09/04
- M Class W164 starting in 2005
- R Class W251 started in 2005
- G Class X164 starting in 2006
- CLS 350 / 500 starting in 2004
- E Class starting in 2004
722.9 became the standard transmission for various chassis, including 164, 171, 203, 204, 207, 209, 211, 212, 215, 216, 219, 220, 221, 230, 251, 463.
4Matic-equipped vehicles were the last models to phase out the 722.6 and shift to 722.9 around 2006 to 2007.
Check these troubleshooting and repair guides for more help on your Mercedes-Benz.
Which Fluid Does Your 722.9 Take
This is the part most guides skip, and getting it wrong is the expensive mistake on this transmission. Mercedes changed the fluid partway through the production run and the two are not compatible.
| Build date | Required fluid |
|---|---|
| Built on or before 21 June 2010 | Red fluid, MB approval sheet 236.14 |
| Built 22 June 2010 or later | Blue fluid, MB approval sheet 236.15 (7G-Tronic Plus) |
Model year is not a reliable guide here, because the changeover falls in the middle of 2010 and cars built late in one model year can carry the next year badge. Use the actual build date on the door jamb plate. If your car sits close to the cutoff, check it a second way:
- Transmission code: a code containing A89 is a Plus unit and takes blue 236.15. No A89 means red 236.14.
- Eco start stop: if the car has it, the transmission is a Plus unit and takes blue.
- Pan dimples: four oval dimples indicate a Plus pan, four round dimples an early pan. Treat this as a last resort, because some early cars were fitted with the later pan during repairs.
- Ask a dealer with your VIN. They can read the transmission code directly. It is a free phone call and it settles the question.
Whatever you buy, match the MB approval sheet number on the bottle (236.14 or 236.15) rather than a brand name or a color. The sheet number is the specification. Color is just how the two are told apart in the bottle.
Why an Infrared Thermometer Is Not Accurate Enough
An IR gun pointed at the pan reads the outside skin of the pan, not the fluid inside it. The pan is aluminum sitting in moving air under the car, so it runs cooler than the fluid and it lags behind as the fluid warms. On a job where the whole level depends on hitting 45 C, that gap matters.
The number you actually want is the ATF temperature the transmission control module is already measuring with its own internal sensor. Reading it is not optional precision on this transmission, it is the difference between setting the level correctly and setting it to whatever the pan skin happened to read.
The YOUCANIC UCAN-II Pro reads live ATF temperature from the Mercedes transmission control module, so you watch the real number climb and open the plug at 45 C. It also reads the 722.9 transmission fault codes, which a generic OBD2 reader cannot see at all because transmission faults are not emissions faults.
If you are doing a full fluid and filter change rather than just correcting the level, the transmission adaptation should also be reset afterwards so the control module relearns shift pressures on the new fluid. That is a command sent to the module, not a code clear, and it is the reason some cars shift worse after a service than before one. A level check on its own does not need it.
Before You Start
- The fluid will be at 45 C and the exhaust next to it will be far hotter. Wear gloves and keep your face out of the line of the drain plug.
- The car must be level, front to back and side to side. A car on ramps or on two stands reads the wrong level and there is no way to correct for it.
- You will be cycling the selector with the engine running and the car in the air. Chock the wheels, set the parking brake, and keep your hands and the drain pan clear of the driveshaft.
- Fit a new drain plug sealing washer. It is a one time use part and it is the usual source of a weep afterwards.
What This Costs
| Who does the work | Typical total cost |
|---|---|
| Fluid for a level correction, DIY | $60 to $140 |
| Full fluid and filter service, DIY | $220 to $380 |
| Full fluid and filter service, independent shop | $350 to $600 |
| Full fluid and filter service, Mercedes dealer | $700 to $1,100 |
| Conductor plate | $600 to $1,400 installed |
| Valve body | $1,200 to $2,400 installed |
These are typical US ranges and labor rates vary widely by region, so treat the independent figures as a floor and the dealer figures as a ceiling. Get a written quote before authorizing anything above the service line.
When the Level Is Not the Problem
A correct level will not cure a transmission that is already faulting. Three failures on the 722.9 are common enough to recognize before you spend an afternoon on fluid:
- Conductor plate. Shudder under load, and speed sensor codes such as P0717 or P0718. The plate carries the speed sensors and the solenoid wiring, and debris in a solenoid produces the shudder. On VGS2 and VGS3 units the plate can be replaced without the valve body.
- Valve body. Harsh cold shifts, holding second gear, limp mode, slipping or unpredictable changes. On VGS1 units the valve body and conductor plate have to be replaced together.
- Torque converter lockup clutch. Metal fragments in the pan alongside lockup codes. This one means a full overhaul rather than a repair.
The control unit on this transmission is coded to your VIN, so a replacement has to be coded to the car. That coding charge is a large part of why a rebuild of your original unit usually costs much less than fitting a new one.
When to Stop and Hand It Over
- You cannot get the car genuinely level. There is no way to compensate for a tilted reading.
- You cannot read actual fluid temperature. Setting this level by guess is how transmissions get overfilled.
- The fluid is dark, smells burnt, or has metal or glitter in it.
- The transmission already slips or flares. Fresh fluid does not cure mechanical wear and can expose it.
- You find fluid weeping around the conductor plate connector, which is a known leak point and a separate repair.
Frequently Asked Questions
Does the Mercedes 722.9 have a dipstick?
No. The level is set by an overflow standpipe inside the pan. With the fluid at the temperature given in the procedure, you open the drain plug and let any excess run out, as described above.
What happens if the 722.9 is overfilled?
Too much fluid can foam, which causes harsh or erratic shifts and fluid pushing out of the vent. Drain to the correct level.
Why does fluid temperature matter so much?
The level changes as the fluid warms up, so a reading taken at the wrong temperature can be off by a large amount. That is why an infrared thermometer or scan tool helps.
Related guides: Mercedes-Benz 7-Speed Transmission Fluid and Filter Change Instructions · Mercedes 722.9 Transmission Seal O Ring Leak · Lookup Mercedes-Benz Transmission by Model, Year · Mercedes-Benz Transmission Malfunction Stop · Mercedes-Benz 9G-TRONIC 725 Automatic Transmission Fluid Change