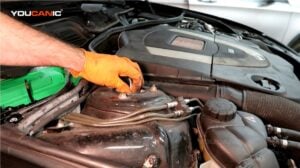

Mercedes-Benz Exhaust Back Pressure Sensor B60 Replacement
Reviewed/Verified by:

The B60 exhaust back pressure sensor comes out with a 27 mm socket in about thirty minutes, and it fits Mercedes diesels using the OM642 engine across the 164, 211, 212, 221, 251, Sprinter and other chassis. Clean the pressure pipe before you replace anything: a blocked pipe produces the same limp mode and the same slow acceleration as a dead sensor, and costs nothing to rule out.
At a Glance
- What B60 is: the exhaust back pressure sensor on the Mercedes OM642 diesel, mounted at the back of the engine near the firewall.
- Typical symptoms: low power, limp mode and codes such as P2510 or P2359.
- Clean the pressure pipe first. Soot blocks the small pipe to the sensor and makes a good sensor read wrong.
- Replacement: a 27 mm socket removes the sensor in about thirty minutes.
- Afterwards, clear the codes and check that the exhaust pressure reading rises with load.
This is one of the most commonly used Mercedes-Benz diesel engines, especially in the U.S. market. This guide provides instructions on replacing the Exhaust Back Pressure (B60) sensor on ML, C, E, R, and Sprinter models. Chassis 164, 203, 204, 207, 209, 211, 212, 218, 219, 221, 251, 461, 463 with engine 642.

Symptoms
Symptoms of a faulty exhaust back pressure sensor include:

🔧 Find out what is actually wrong before you pay someone to guess
Dealer level diagnostics at home with the YOUCANIC UCAN-II Pro.
- ✔ Covers most makes and models, including many luxury brands. Send us your VIN and we will confirm your car before you order
- ✔ Reads every module, not just the engine, so you find the faults a basic reader says are not there
- ✔ Commands the car: test a fan or pump, bleed ABS, retract an electronic parking brake, register a battery
- ✔ No subscriptions. Free lifetime updates, so the price you pay is the whole price
- ✔ Backed by real mechanics in the USA you can email before and after you buy
Featured in The Wall Street Journal
- Lack of engine power
- Pressing the gas pedal has no effect.
- Difficulty accelerating, especially uphill or on the highway
- It takes a long time for the vehicle to reach 60mph (100 km/h)
- The vehicle is stuck in limp mode.
- Possible fault codes in the CDI control unit (N3/9).
- P2510, P2359, P2616, P2592
- P2510 + P2359,
- P2510 + P2616
- 11D300, 126800, 126900
What you will need

- Mercedes Exhaust Back Pressure Sensor
- 27mm socket
- Ratchet wrench
- Metric Sockets
Instructions
How to change Mercedes-Benz Exhaust Back Pressure Sensor B60.
- Park the vehicle and allow it to cool down.
- Open the hood by pulling the hood release under the dashboard.

- Use a 13mm socket to remove all four bolts for the top metal plate above the engine. This step applies to W251 R350 BlueTec only.
- Grab the engine cover and remove it by pulling it straight up.
- Locate the exhaust backpressure sensor (B60) at the back of the engine (near the firewall).
- Press the tab on the electrical connector and pull it away to remove it.
- Use a 27mm socket to loosen and remove the sensor. Once the sensor breaks loose, you can remove it by hand. Be careful not to drop the sensor.
- Install the new sensor and connect the electrical connector.
- Use a scanner that covers Mercedes diesel engine modules to clear fault codes stored in the CDI control unit.


That’s it. Replacing the exhaust backpressure sensor (B60) on a Mercedes-Benz is easy and can be completed in about thirty minutes.
Troubleshooting with YOUCANIC UCAN-II Pro
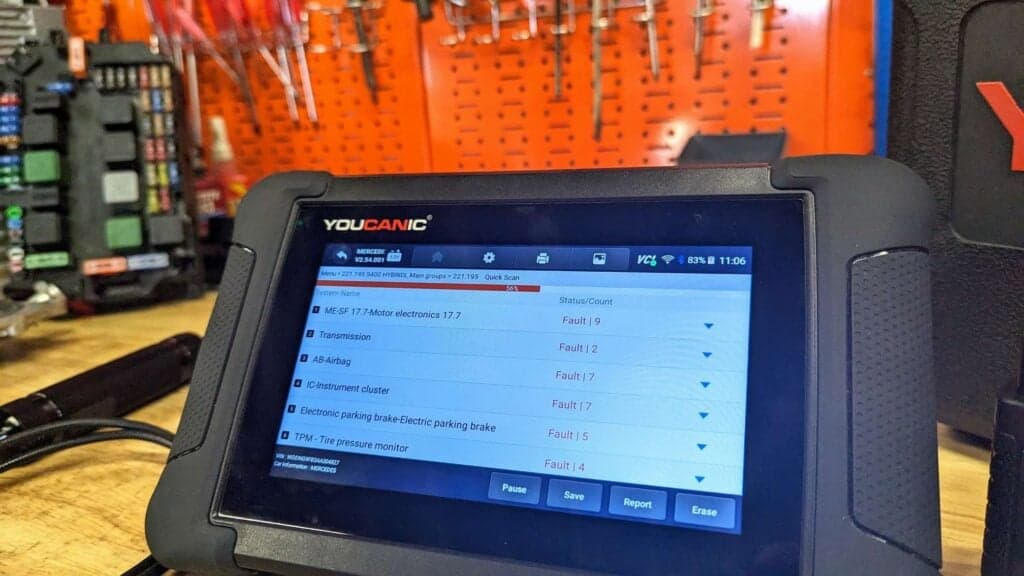
Reading the code is the easy part. What this job actually needs from a scan tool is live data and a service function: the measured exhaust pressure in millibar so you can see whether B60 is reporting sensibly against a known good value, and the ability to command a forced particulate filter regeneration once the sensor is replaced. Without the forced regen you are relying on the car choosing to regenerate by itself, which it may refuse to do while soot load is high. The YOUCANIC UCAN-II Pro does both on these engines, along with resetting the adaptation values afterwards.
Clean the pressure pipe before replacing the sensor
This is the step that saves most people the price of a sensor. B60 does not sit in the exhaust stream itself. It is mounted away from the heat and connected to the exhaust by a narrow metal pipe, usually with a short length of hose at the sensor end. That pipe is where the trouble is. Soot and oily condensate build up inside it over the years until it is partially or completely blocked, and a blocked pipe means the sensor is measuring nothing at all while being in perfect working order.
With the sensor off, disconnect the pipe and check that it is clear. A length of welding wire or a long cable tie pushed through will tell you quickly. Carbon deposits can be cleared mechanically and then blown through with compressed air. Check the rubber section too, since these harden and crack with heat and will leak pressure without looking obviously damaged.
Fitting a new sensor to a blocked pipe reproduces the original fault within days, and that is the most common reason people end up replacing this sensor twice.
What the sensor is actually for
B60 measures exhaust pressure so the engine control module can work out how loaded the diesel particulate filter has become. Soot accumulating in the filter raises the pressure upstream of it, and when that rise reaches a threshold the module starts a regeneration, injecting extra fuel to raise exhaust temperature and burn the soot off.
That is why a faulty reading causes more than a warning light. If the sensor under reports, the car may never regenerate and the filter gradually blocks solid, which ends in a very expensive replacement. If it over reports, the car attempts regeneration far too often, which dilutes the engine oil with fuel and shortens service life. Either way this is a fault worth attending to rather than living with.
Related codes you may see alongside it include pressure sensor circuit faults and particulate filter loading codes. If your car has stored a P1402 or a Mercedes specific code 2078, our guide to the Mercedes DPF exhaust pressure sensor problem covers that scenario in more detail.
After the repair, let the car complete a regeneration
Clearing the code is not the end of the job. If the filter has accumulated soot while the sensor was reporting incorrectly, the car needs a full regeneration cycle to clear it. That normally requires a sustained drive at steady speed with the engine fully warm, typically twenty minutes or more of continuous running rather than a short trip around town.
Short journeys are what cause most of these problems in the first place. A diesel that only ever does a few miles at a time never gets hot enough to regenerate properly, and the soot load climbs regardless of how healthy the sensor is. If that describes how the car is used, a longer run every couple of weeks will do more for the exhaust system than any part you can fit.
A full system scanner that supports Mercedes will show the measured exhaust pressure and the calculated soot loading in live data, and on many models can command a regeneration directly. That is the difference between confirming the repair worked and hoping it did.
What this costs against what it prevents
The sensor itself is one of the cheaper parts on a modern diesel. Aftermarket B60 sensors typically run somewhere between fifty and a hundred and twenty dollars, with genuine Mercedes units two to three times that. Fitting is usually under an hour, and an independent specialist will normally charge accordingly. A dealer carrying out diagnosis and replacement will be several hundred dollars all in.
The reason to deal with it promptly is the part downstream. A particulate filter that has been allowed to load up because the pressure signal was wrong is a four figure replacement on most of these models, and often more on the larger engines. Spending under a hundred dollars on a sensor and an hour of attention to avoid that is the whole argument for not driving on with the warning light.
When it is worth handing over
If the filter is already heavily loaded and the car has gone into limp mode, a forced regeneration needs to be done properly and with the car in a safe place, because the exhaust reaches temperatures that will set fire to dry grass under the vehicle. If the stored soot mass is past the point where regeneration is allowed, the filter has to come off and be cleaned or replaced, which is not a driveway job. And on cars where the fault keeps returning after a good sensor and a clear pipe, you are usually looking at an injector or glow plug problem feeding the filter more soot than it can burn off, which needs proper diagnosis rather than another sensor.
Buying the tool against renting it, and when you need neither
If this is a one off repair on your own car, you do not have to buy a scan tool to finish it. You can rent one for seven days instead, which covers the reading and the post repair check without the cost of owning one. Shipping both ways is included and it is United States addresses only.
And there is a real chance you need no tool at all here. The page above says to clean the pressure pipe before replacing anything, and that is not advice to skip lightly. A blocked pipe produces the same reading as a failed sensor, costs nothing to clear, and is the more common of the two. Clear it, drive the car, and see whether the complaint survives before you spend money on either a part or a tool.
Frequently Asked Questions
Can I drive with a bad exhaust back pressure sensor?
For a short time. The engine may go into limp mode, and the DPF may not regenerate properly, so fix it soon to avoid a clogged filter.
Should I check the pressure pipe before replacing the sensor?
Yes. A cracked, blocked or disconnected pressure pipe gives the same codes as a failed sensor and costs far less to fix.
Will the warning clear by itself after the repair?
Clear the stored codes with a scan tool, then drive the car so the engine computer can confirm the readings are normal.