

How to Change a Car Windshield Yourself
Replacing the windshield on your vehicle can be tricky. This guide provides a step-by-step procedure for replacing it.
How to Replace Car Windshield
What you will need
- Windshield Removal Tool
- (2x) Auto Glass Windshield Urethane Adhesive
- Protective Gloves
- Two People
- Razor Blade
- Urethane Primer
- Windshield Suction Cups
- Caulk Gun (Electric preferred)
Procedure
Start by removing the wiper arms, trims inside, and rearview mirror.

Remove the exterior trim around the windshield. The exterior windshield trim has clips that snap in place. Carefully pry out the trim around the windshield. Carefully remove any clips, fasteners, and retainers. Avoid breaking or losing them because they can usually be re-used.
- Remove the windshield cowl.
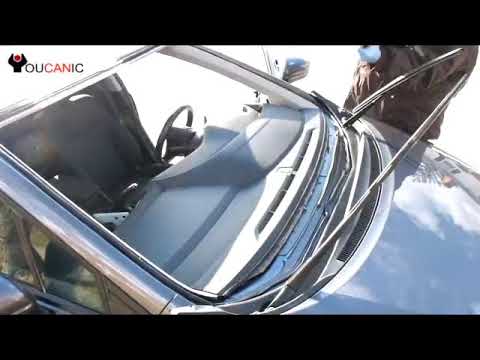
- Cut the urethane seal around the perimeter of the windshield. You will need a special long knife for this step. The easiest and cheapest way to remove the windshield is to use an 18″ Urethane Cut-Out Knife, which professionals typically use. Cut the urethane around the perimeter of the windscreen.


- As you cut out the windshield, carefully minimize damage to the pinch weld. Other methods to cut out the urethane include using a guitar string or a stiff, thin wire.

Once the urethane is cut, remove the cracked windshield. Next, use a glass scraper blade to remove the old urethane.
 No subscriptions • lifetime updates
🔧 Stop paying the dealer for every warning light
Get dealer level diagnostics at home with the YOUCANIC Full System Scanner.
- ✔ Works with all makes and models, including most luxury brands
- ✔ Topology map view shows all vehicle modules on one screen for faster diagnostics
- ✔ Bi directional controls to test fans, pumps, actuators and more so you do not have to guess
- ✔ Special resets and calibrations such as ABS bleed, EPB service, battery registration and more
- ✔ Free lifetime updates with no recurring fees
- Clean any dirt or debris left on the frame.


- There should be no dirt or debris where the urethane is applied.

Prime the pinch weld. As you cut out the urethane, you probably created a few scratches. Apply urethane primer to the windshield perimeter, inside the edge, and in the window channel. The primer can help the urethane glue better and act as a rust prohibiter when applied to the window channel, especially if there are scratches. Don’t worry if you created a few minor scratches; even an auto glass professional can’t avoid making a few scratches to the pinch weld. Just make sure always to use urethane primer to ensure that rust doesn’t develop. If there is rust in this area, you may want to sand it down and prime it. After you apply the primer, wait a few minutes before you apply the urethane bead.
- Apply a bead of urethane around the perimeter of the window frame. The bead needs to be continuous, with no gaps in between. Remove the bottom cap from the urethane cartridge, then install it on your caulk gun. Carefully lay the bead of urethane. Try to keep the bead of urethane as one continues the line. Avoid stops and move your hand at a constant speed.

- If there are any spots where the urethane bead is not continuous, add some more urethane or use a small spatula to fix the urethane.

- Be careful not to let any urethane fall on your car’s paint. Removing the urethane from the paint can be challenging.
- Install the new windshield. We recommend getting help from another person to help you lay down the new windshield.
- Once you have placed the windshield on the car, push it with the palm of your hand around the glue line.
- Re-install the cowling wipers, trims, and mirrors you may have removed.
- Allow the car to remain parked for a few hours and for the urethane to cure. It can take up to 48 hours for the urethane to completely cure. See the note on the back of the urethane cartridge.


Notes
- If you are planning on installing a windshield by yourself, it is recommended that you use heavy-duty suction cups to handle the windshield. Wear rubber gloves to avoid contaminating the windshield glass or getting grease on it.
- Return later if you miss any spots or the bead is too thin. Some windscreens may have small plastic clips around the frame. The clips help align the windshield. If you need to replace the clips, slide them and lock them into place.
- Once you apply the urethane to the car, don’t wait too long to install the windshield. The sooner you install the windshield, the better.
- Don’t use a car wash for at least two days after installing a new windshield.
- If you have a newer car, you may want to leave this job to the professionals. Call auto glass repair shops in your area and get a few windshield replacement quotes.
Do NOT use silicone to install a windshield. ONLY USE auto glass urethane. To create a strong bond between the windshield and the car frame, you will need approximately 15-20 fl. oz. of automotive-grade urethane.
Note that the windshield is part of the car’s structural integrity, especially on today’s unibody vehicles.
- If you install the windshield for the first time, you will most likely try to apply the urethane using a hand caulking gun. While a hand caulking gun can be used, it isn’t easy to apply a continuous bead.
We recommend that you heat the urethane cartridge before you apply it, or it will be nearly impossible to get the urethane to come out. Note that professionals will either use an air-powered caulk gun.
Always use protective eyewear and gloves when you handle glass.
- The windshield supports your roof and helps the dashboards and A-pillar airbags function properly. A weak bond between the glass and the body can cause the windshield to come off during an accident or when the airbag goes off.
We hope that this guide helped you replace the windshield successfully. We have published more videos and tutorials to help with your vehicle problems.
Disclaimer
- Front and rear windshields play a key role in your vehicle’s structural integrity and safety. For this reason, we recommend having a certified installer replace the windshield.


Wow, awesome post, great detail and information. Thank you for sharing.
I had a friend that replaced the windshield using silicone and that wasn’t a good idea. Make sure you use urethane for a good bond between the windshield and the car.
Hi,
Thanks for putting together this free windshield replacemend guide. I had replace the back glass on my Mercedes and was quoted $1000+ to change it. Found a used rear glass at a junk yard and installed it using the tips found here. I have to say that you were right about getting the urethane out of the cartridge, it was the most difficult part. Ended up getting a powered caulk gun and it was much easier.