
Replace Battery on Mercedes-Benz GLK
Reviewed/Verified by:

Can’t start your Mercedes-Benz GLK due to a dead battery? Learn how to fix the problem by replacing your Mercedes-Benz battery. This guide provides step-by-step instructions on how to replace the battery on a Mercedes-Benz GLK-Class.

What you will need
You will need this to replace the battery on a Mercedes-Benz GLK-Class.
Parts

🔧 Find out what is actually wrong before you pay someone to guess
Dealer level diagnostics at home with the YOUCANIC UCAN-II Pro.
- ✔ Covers most makes and models, including many luxury brands. Send us your VIN and we will confirm your car before you order
- ✔ Reads every module, not just the engine, so you find the faults a basic reader says are not there
- ✔ Commands the car: test a fan or pump, bleed ABS, retract an electronic parking brake, register a battery
- ✔ No subscriptions. Free lifetime updates, so the price you pay is the whole price
- ✔ Backed by real mechanics in the USA you can email before and after you buy
Featured in The Wall Street Journal
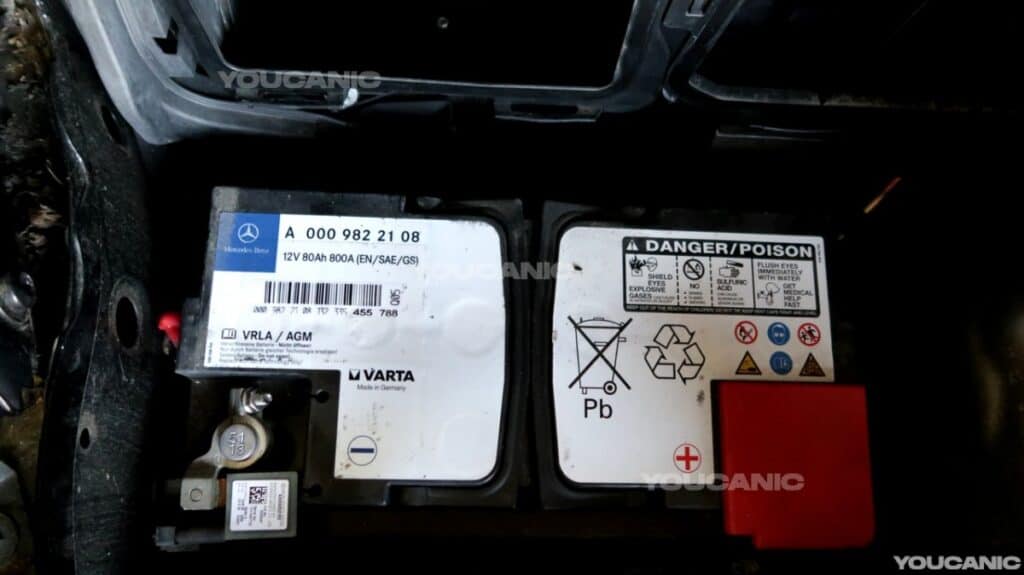
- H7 AGM Battery
- Cold Cranking Amps(CCA): 800 to 850 Amps
- OEM part number: A 000 982 21 08
Tools
- Mechanic Tool Set
- 10mm socket
- 13mm ratchet wrench
- Battery Terminal Cleaner
Procedure
- Open the hood of the vehicle. If the battery is dead and the vehicle doesn’t unlock, use the emergency key inside your keyfob to unlock the driver’s door.
 To open the hood, you need to pull the hood release below the dashboard, go to the front, and then unlock the hood latch under the hood. Once the hood latch is unlocked, you can pull the hood up.

- Remove the compartment above the battery. Find the battery located on the passenger’s side of the engine compartment. To remove the compartment above the battery, unlock the clips, and unlock it, you need to push it out of the way, and for the middle lock, just pull it using a hook or your hand. Then, jiggle out of the compartment to remove it. The clips of the compartment above the battery.
- Disconnect the positive and negative terminals. Pull out the red cover on the battery to locate the positive terminal. Then, put the positive and negative terminals away and ensure they are not touching each other. Use a 10mm wrench to disconnect the terminals. Disconnect the negative terminal first positive last.
- Remove the battery bracket located on the right side of the battery. You must remove the 13mm bolts using a ratchet wrench to remove the bracket. Then pull; you can already pull out the battery bracket.
 Removing the bolts of the battery bracket.
- Remove the battery from the vehicle. Use the handles on the battery to pull it up.
- Install the new battery. To put the new battery, you need to slide it to the left so that the tab on the left side will lock the battery on its tray and ensure it is seated properly on the tray.
- Reinstall the battery bracket and the 13mm bolts. Use a 13mm ratchet to tighten the bolts back in. Use a battery brush to clean the battery terminals.
- Connect the positive cable to the positive battery post. Tighten the 10mm nut, then return the red cover on the positive terminal.
- Connect the negative cable to the negative battery post. Tighten the 10mm nut on the battery terminal.

- Start the engine and allow it to idle for a minute.
- ABS and traction control lights will be on, but this is normal. To reset them, turn the steering wheel to the right and left. Repeat a couple of times. Then, drive for five minutes, and the warning lights, including ABS and tracking control lights, should reset.
 To open the hood, you need to pull the hood release below the
 Once the hood latch is unlocked, you can pull the hood up.

 The clips of the compartment above the battery.


 Removing the bolts of the battery bracket.


Read the fault codes via the OBD-II port if warning lights remain on.
Check these troubleshooting and repair guides for more help on your Mercedes-Benz.
Register the new battery to the car
This step gets skipped constantly and it costs people the battery. Mercedes records the age and type of the fitted battery and adjusts charging voltage to suit it. A car that has not been told about a replacement keeps charging a brand new battery on the worn out one’s profile, which leaves it chronically undercharged, shortens its life by years and causes intermittent electrical faults in the meantime.
Registration takes seconds with a tool that supports it, such as YOUCANIC UCAN-II Pro. If you have fitted a different type from the one that came out, an AGM in place of a flooded battery for example, registering the correct type matters as much as registering that it is new, because the charging strategy differs between them.


