

Replace Engine Spark Plug & Ignition Coil Chrysler 3.6L Pentastar
Reviewed/Verified by:

Replacing the engine spark plugs and ignition coils on a Chrysler 3.6L Pentastar engine is a routine maintenance task that should be performed every 100,000 miles or as the manufacturer recommends.
At a Glance
- Engine: Chrysler 3.6L Pentastar V6 (Chrysler, Dodge, Jeep and Ram models)
- Interval: Spark plugs about every 100,000 miles or per your maintenance schedule
- Gap: 0.043 in (1.1 mm); plugs come pre-gapped
- Torque: 13 ft-lb (about 18 Nm), engine cold
- Access: The rear bank plugs require removing the upper intake plenum
- Still misfiring? Swap a coil to another cylinder and see if the misfire follows
The spark plugs and ignition coils play a crucial role in the ignition system, responsible for delivering an electric spark to ignite the fuel-air mixture in the engine’s cylinders. Over time, these components can wear out and cause problems such as misfires, reduced fuel efficiency, and decreased engine performance.
Replacing the spark plugs and ignition coils is straightforward and can be done with basic tools. Still, it is important to use high-quality replacement parts to ensure reliable operation and longevity. Failing to replace the spark plugs and ignition coils can result in further engine damage and costly repairs.

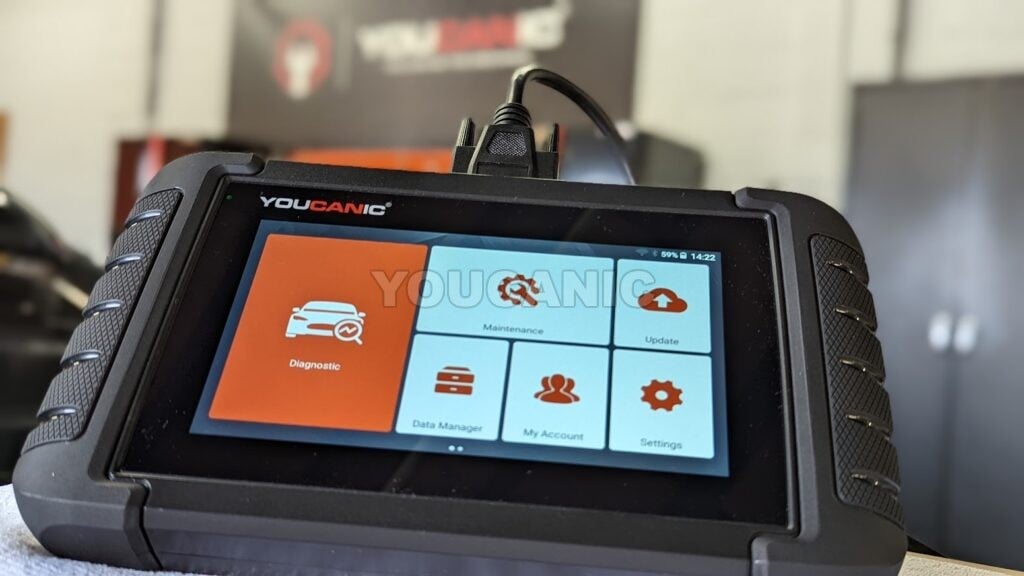
🔧 Stop paying the dealer for every warning light
Get dealer level diagnostics at home with the YOUCANIC Full System Scanner.
- ✔ Works with all makes and models, including most luxury brands
- ✔ Topology map view shows all vehicle modules on one screen for faster diagnostics
- ✔ Bi directional controls to test fans, pumps, actuators and more so you do not have to guess
- ✔ Special resets and calibrations such as ABS bleed, EPB service, battery registration and more
- ✔ Free lifetime updates with no recurring fees

What you will need
- (6) 3.6 Pentastar Engine Spark Plugs
- NGK Laser Iridium #1989
- Champion RER8ZWYCB4: OEM
- Autolite XP Iridium #XP5701
- Ignition Coils Mopar 5149168AI
- OEM ignition coil for Chrysler 3.6L Pentastar engine. It is recommended to stay with the original factory coils to avoid problems down the road. Interchange part number: UF648, C1791, 5C1848, E1148, 2505484816, Supersedes 5149168AH.
- 1/4″ Drive Ratchet
- 3″ Extension (1/4″)
- 10 mm Socket
- 8 mm socket
- 5/8″ Spark Plug Socket (3/8″)
- 12″ Extension (3/8″)
- 3/8″ Drive Ratchet
- Dielectric Grease
- Torque Wrench
Procedure
- Allow the engine to cool down. Open the hood.
- Disconnect the negative battery terminal.
3. Remove the engine cover by pulling it up. You don’t need to remove any screws to remove the engine cover. Disconnect the vacuum lines from the intake manifold. Disconnect the air intake from the throttle body. Disconnect any vacuum tubes connected to the air intake tube. Loosen the 8 mm hose clamp screw.

4. Unplug the air temperature sensor near the throttle body. Remove the 8mm bolts (in some engines, these may require a T30 Torx bit) that secure the intake plenum (manifold) to the top of the engine. Seven bolts need to be removed. These are long bolts and don’t need to come out. Remove the two 10 mm bolts on the front. Remove the two 10 mm bolts on the back of the intake manifold.

5. Remove one 13 mm bolt on the metal bracket and push the bracket back. Next, lift the intake manifold and move it aside. Cover the intake with a clean newspaper so no foreign object or dirt falls inside the engine.
Note: Rubber Gaskets between the plenum and intake manifold. When you remove the intake plenum, you will notice three rubber gaskets between the plenum and the intake manifold. These gaskets are typically integrated into the intake manifold part and don’t necessarily need to be removed. Please do not add silicone or gasket sealant here; it is unnecessary. The most important thing is to tighten the intake plenum bolts to spec as described in the following steps.

6. Remove the 10 mm bolts holding the ignition coils.

7. Unplug the electrical connectors from the ignition coils.

8. Remove the old spark plugs.

9. There are six plugs. Three on each cylinder bank.
 NOTE: Be careful that NO foreign materials fall into the combustion chamber via the spark plug holes. Install the new spark plug by lowering it slowly. All spark plugs that are iridium or platinum spark plug should come pre-gapped. You should always double-check them and ensure they are all gaped correctly before inserting them into the cylinder head.

10. Install the spark plugs. Use the extension and 5/8″ socket to tighten the new spark plugs. Tighten the spark plugs to 10 ft-lbs. If you are not using a torque wrench, you may want to get your spark plugs snug, then turn an extra half a turn. Add a coat of dielectric grease to the end of the coil pack boot.

11. Insert the coil into the spark plug hole. Tighten the 10 mm bolts until they are snug; don’t over-tighten them.

12. Install the plenum. If you have new gaskets to install between the intake manifold and plenum, now is the time to replace them. Otherwise, go to the next step.

13. Install the plenum in reverse order of removal. The seven bolts must be torqued to 7 to 9 Nm (5 to 6.6 lb/ft). These bolts must be torqued to spec.
14. Next, tighten the two 10mm bolts in front of the plenum. Next, install the bracket on the other side of the plenum. Place the bracket and tighten the 10mm and 13mm bolts.
15. Reinstall in reverse manner. Reattach the air intake tube to the throttle body. Reconnect any vacuum hose you disconnected earlier, such as a PCV and makeup line. Reconnect the wiring harness that you may have removed. Reinstall the engine cover by placing it on top and pressing it down until you hear it lock. Reconnect the negative engine terminal.
16. Start up the engine and make sure the engine is running smoothly.
If you need to reset the check engine light on your dashboard, you will need the YOUCANIC UCAN-II Pro to clear the fault code after replacing the spark plugs of your Chrysler 3.6L Pentastar.
Applications
This 3.6L Chrysler Pentastar engine is found in the following makes and models, and the instructions found on this page will help owners of:
- 2011 to 2016 Chrysler 200 (Models: LX, Touring, Limited, S, and C)
- 2011-present Chrysler 300 (Models: 300 Base, 300 S V6, 300 C w/ V6, 300 C Glacier Series w/ V6, 300 C Luxury Series w/ V6)
- 2011 to 2016 Chrysler Town & Country (Models: LX, Touring, Touring “L”, Limited, S, Limited Platinum)
- 2011 to 2014 Dodge Avenger (Models: SE V6, SXT, R/T)
- 2011-present Dodge Challenger (Models: SE, SXT, SXT +, SXT Rallye Edition)
- 2011-present Dodge Charger (Models: SE, SXT, SXT +, SXT Rallye Edition)
- 2011-present Dodge Durango (Models: Express, SXT, Crew, Crew Lux, Citadel, ACT Plus, Limited, R/T)
- 2011 to 2015 Dodge Grand Caravan (Models: SE American Value Package (AVP) or Canadian Value Package (CVP), SE, Crew, Crew Lux, SXT, R/T SE Plus, SXT Plus)
- 2011-present Dodge Journey (Models: SE American Value Package (AVP) or Canadian Value Package (CVP), Mainstreet, Crew, Crew Lux, SXT, R/T Crossroad)
- 2011-present Jeep Grand Cherokee (Models: Laredo “E,” Laredo “X,” 70TH Anniversary Edition, Trailhawk, Altitude Edition, Limited, Overland, Overland Summit Edition)
- 2011 to 2014 Volkswagen Routan (Models: S, SE, SEL, SEL Premium)
- 2012-present Fiat Freemont
- 2012-present Jeep Wrangler (Models: Sport, Unlimited Sport, Sport “S,” Unlimited Sport “S,” Freedom Edition, Unlimited Freedom Edition, Altitude Edition, Unlimited Altitude Edition, 70TH Anniversary Edition, Unlimited 70TH Anniversary Edition, Sahara, Unlimited Sahara, Moab, Unlimited Moab, Rubicon, Unlimited Rubicon, Rubicon 10TH Anniversary, Unlimited Rubicon 10TH Anniversary)
- 2012 to 2015 Lancia Voyager (Models: Limited)
- 2012 to 2014 Lancia Thema
- 2012 to 2015 Ram Cargo Van (Models: C/V Base, C/V Tradesman)
- 2013-present Ram 1500 (Models: Tradesman, SLT, HFE)
- 2014-present Ram ProMaster
- 2015 to 2016 Chrysler 200 (295-hp, 262-lb ft)
Specifications
- The spark plug gap is 0.043 in (1.1 mm).
- The spark plug tightening torque is 13 ft-lb (about 18 Nm).
Spark plugs come pre-gapped, so leave them alone
The plugs specified for this engine arrive set to the correct gap and should be fitted as supplied. Checking gently with a wire feeler gauge is fine. Prying at the electrode to adjust it is not, because the fine center electrodes used on platinum and iridium plugs snap or crack their insulators very easily, and a plug damaged during gapping will misfire from the moment it goes in.
Work on a cold engine and use a torque wrench
These are aluminum cylinder heads and aluminum threads strip easily. Let the engine cool completely before removing anything, because pulling plugs from a hot head is the most reliable way to damage the threads, and a stripped plug hole means a thread insert at best.
Torque the new plugs to the figure in the specifications above rather than going by feel. Under tightening leaves a poor seal and lets combustion gases past, while over tightening crushes the washer and pulls the threads. Do not add anti-seize either. Modern plugs have a plated shell designed to be fitted dry, and anti-seize acts as a lubricant on the threads, so the torque wrench clicks well before the plug is actually tight and you over tighten it without knowing.
Blow out the plug wells with compressed air before removing the old plugs. As the procedure above warns, anything that falls into an open cylinder has to come back out, and grit sitting in the well will go straight in when the plug is withdrawn.
Inspect the coil boots and read the old plugs
With the coils out, look inside each boot for carbon tracking, the thin black lines that show the spark has been finding a path to ground down the outside of the plug rather than jumping the gap. A boot that is tracking will make a brand new plug misfire straight away, and boots cost very little.
Look at the old plugs before discarding them, because they record how each cylinder has been running. A light tan or grey insulator is healthy. Black and sooty suggests a rich mixture, oily deposits point to oil passing valve stem seals or rings, and a white blistered insulator with eroded electrodes suggests that cylinder has run hot or lean. If one plug looks clearly different from the other five, that cylinder is worth investigating rather than simply capping with a new plug.
If the engine still misfires afterwards
New plugs and coils do not fix every misfire. Injectors, vacuum leaks, a stretched timing chain and low compression all produce the same symptom. If the check engine light returns, read the code to find out which cylinder is complaining, then swap that cylinder’s coil with a neighboring one and clear the code. If the misfire follows the coil to the new cylinder, the coil is at fault. If it stays with the original cylinder, the problem is mechanical or fuel related and no ignition parts will cure it.
A full system scanner shows misfire counts per cylinder in live data, which makes that test immediate rather than requiring a drive cycle, and on FCA vehicles from around 2018 onward you may also need a Security Gateway bypass before a scan tool is permitted to clear codes at all.
Frequently Asked Questions
How often should I replace spark plugs on a 3.6L Pentastar?
About every 100,000 miles, or as listed in your vehicle’s maintenance schedule.
What is the spark plug gap on the 3.6 Pentastar?
0.043 inch (1.1 mm). The plugs come pre-gapped, so avoid bending the electrode.
What is the Pentastar spark plug torque?
13 ft-lb (about 18 Nm), installed in a cold engine. The cylinder heads are aluminum and strip easily.
Do I need to remove the intake to change the rear spark plugs?
Yes. The upper intake plenum must come off to reach the rear bank coils and plugs.





Excellent video! After I replaced the spark plugs on my 2015 Grand Caravan R/T with 99,000 miles on it, I went right to my wife’s 2015 Town & Country Touring and replaced those spark plugs also. Total time between the two was 4 1/2 hours, I could have done it faster, but I was cleaning as I went along. These plugs should be replaced at 90,00 miles instead of 100,000 miles. Both cars run so much better and idle smoother.
Yes.
Shouldn’t we replace the upper Intake Manifold Gaskets while they are accessible?
In step 7, how many Rubber Gaskets between the plenum and intake manifold?
I thought it should be 6 and I found some parts. Felpro Upper Intake Manifold Gasket/ Plenum Gasket Part # MS 97205
Is this right one?
At the beginning, it said torque specs should be 13 ft/lb. However it was 10ft/lb in step 10.
Could you clarify these?
Thanks
jason
Great video. You inspired me to do this job and it worked! Only cost me $60 in plugs and a $17 sparkplug socket. Thanks so much!
Going to use these instructions to change my plugs. Thank you
Excellent article full of facts!