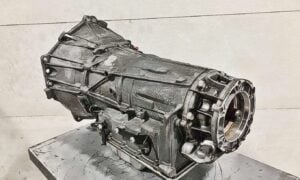

Mercedes Suspension Ride Height Level Sensor
Reviewed/Verified by:

Mercedes-Benz vehicles equipped with airmatic suspension have three to four Suspension Height Level Sensors. The airmatic suspension uses input from these sensors to automatically self-level the vehicle height based on the vehicle load.
At a Glance
- What they do: three or four ride height sensors tell the AIRMATIC system how high each corner sits. Each has two Hall elements, and a fault sets when they disagree.
- Check the link rods first. A broken or detached link is cheaper and more common than a failed sensor, and Mercedes recalled exactly this failure on 2007 to 2009 E-Class wagons.
- Typical messages: Airmatic Visit Workshop, Stop Car Too Low, or one corner stuck high or low.
- Calibrate after replacing. The procedure needs an inclinometer and a level surface, not just a scan tool.
- Low but no warning message? That points at the sensor rather than a leak. The car is not complaining because it thinks it is level.
- Never work under a car held up by air suspension.
Mercedes-level sensors determine the position of the airmatic strut, which determines the vehicle’s load. Level sensors are also known as suspension ride height sensors. A level sensor should not be confused with the axle damping valve unit.


🔧 Find out what is actually wrong before you pay someone to guess
Dealer level diagnostics at home with the YOUCANIC UCAN-II Pro.
- ✔ Covers most makes and models, including many luxury brands. Send us your VIN and we will confirm your car before you order
- ✔ Reads every module, not just the engine, so you find the faults a basic reader says are not there
- ✔ Commands the car: test a fan or pump, bleed ABS, retract an electronic parking brake, register a battery
- ✔ No subscriptions. Free lifetime updates, so the price you pay is the whole price
- ✔ Backed by real mechanics in the USA you can email before and after you buy
Featured in The Wall Street Journal
How to Replace Mercedes-Benz Ride Level Sensor?
In the following video, you will learn how to remove and replace the level sensor on Mercedes-Benz with Airmatic suspension. The work was performed on a W221 S-Class, but the procedure is the same for other models, including Mercedes-Benz E-Class, GL-Class, M-Class, CLS-Class, R-Class, and other models with airmatic.
What you will need
- Mercedes Suspension Level Sensor
- Torx Socket Set
Many Mercedes-Benz owners experience a problem because the linkage of the level sensor breaks or the level sensor itself fails. When one sensor is faulty, the airmatic system will try to level the vehicle, leading to a too-high or too-low vehicle.
There is a level sensor for each of the two air struts on the front. A third-level sensor is often located above the rear axle (near the rear differential) and attached to the rear sway bar. The third suspension level sensors measure the approximate position of the two back air struts. If this level sensor fails or the linkage breaks, the vehicle will drop on the back (both sides).
Symptoms
If one of the suspension height level sensors fails, you will notice one or more of the following symptoms.
- Airmatic Malfunction Visit Workshop message on the instrument cluster
- Stop Car Too Low message.
- The vehicle drops to the ground at one of the front corners.
- The strut is locked out at max inflation and very high
- The back of the car (both sides) drops to the ground
if the rear axle sensor fails. The rear of the car will
not raise even with new struts. - Airmatic: Visit Workshop Displayed in Instrument
cluster and Fault Code 5151: [B22/3 (Rear Axle Level
Sensor): Signal Implausible]
Troubleshooting Mercedes Level Sensor
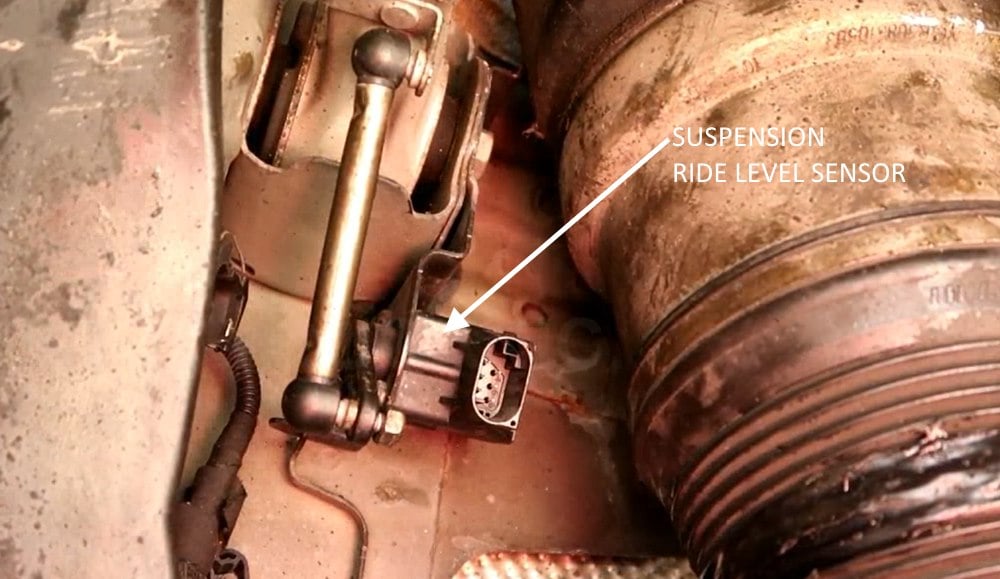
When a Mercedes is taken in for another service, such as a control arm or air strut replacement, the mechanic working on the car accidentally bends the B22/9 or B22/8 sensor mounting plate linkage.
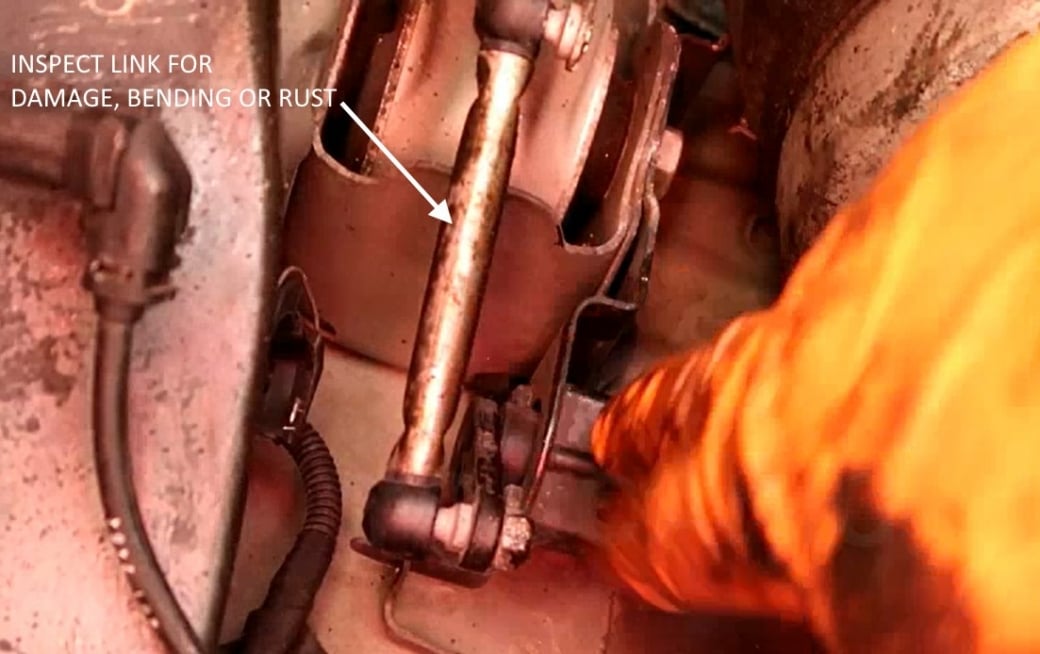
The airmatic control module no longer reads the correct vehicle heights. We recommend you check the level sensor link, wiring, and mounting place. From our experience, it is more common for the link to bend or fail than the level sensor. The link itself can often break, causing the level sensor to malfunction.
If you are experiencing problems with the airmatic, always start by checking the ride height level sensor links. Remove the front two wheels and inspect the suspension level sensor mounted next to the upper control arm.
You have level sensors at each front strut. Depending on the chassis, you will have a level sensor above the rear axle or one for each rear strut.
If you notice that the linkage is bent, you may be able to bend the link back to the correct position. The problem is that, in many cases, the link is either rusted or damaged beyond repair. If so, we recommend replacing a faulty level sensor with an OEM Mercedes Level Sensor. If the link is not damaged, the next step is to read the fault codes using an OBD-II scanner designed for Mercedes-Benz vehicles.
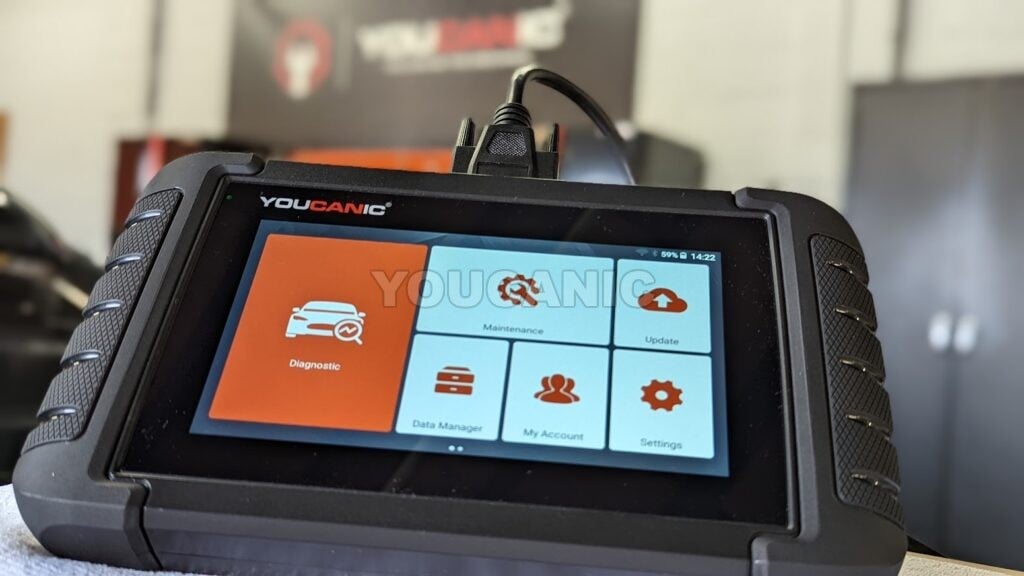
The YOUCANIC UCAN-II Pro can read and clear fault codes through every control module on a vehicle, if the vehicle is supported.
Where is the Level Sensor Located on a Mercedes-Benz?
Description of Ride Height Level Sensors on vehicles with three sensors. Vehicles with four sensors have one sensor at each air strut.
- B22/8 Left the front level sensor
- B22/9 Right front-level sensor
- B22/3 Rear axle level sensor
You can purchase replacement Mercedes-level sensors online. Search for the Mercedes Ride Height Sensor for your model.
Calibration is part of the job, not an optional extra
Here is the part almost nobody explains, and it is why so many home calibrations fail. The Mercedes procedure asks you to enter an inclination angle for each axle. That value is not looked up in a table and it is not calculated. It is measured, with an inclinometer, on a level alignment rack.
The factory job aid calls for a Romess inclinometer and a level or MKS compliant alignment rack. You settle the suspension first: raise, wait two minutes, lower, wait two minutes. You measure each corner, starting left front. Then under control unit adaptations and level calibration, the tool shows a permitted range for front and rear axle inclination, and you type your measured values in, fronts as read and rears entered as negative numbers. The module accepts the calibration only if the measured angles, the side to side deviations and the sensor voltages are all in tolerance. Otherwise it rejects it.
This is why borrowed numbers from forums do not work. The angles are a property of your car on that rack, not a specification you can copy from someone else. If you have no inclinometer and no level surface, this is where the job stops being a driveway repair.
One more detail that catches people out: the final verification has to run in order. Exit and disconnect the diagnostic tool, ignition off, restart the engine, raise and wait two minutes, lower and wait two minutes, then measure against specification. Out of order, the reading means nothing.
This is the step that most often leaves a car sitting at the wrong height after an otherwise correct repair. A ride height sensor reports an angle, and the control module converts that angle into a height using stored calibration values. Fit a new sensor and those stored values no longer match the part reporting them, so the car will happily settle nose down, tail high or leaning to one side while every component is brand new and working.
Calibration has to be carried out with diagnostic software, with the vehicle unladen on level ground and the suspension settled. Measuring from the ground to the center of the wheel arch at each corner before you start gives you a reference to check against afterwards. A full system scanner that supports Mercedes will read the individual sensor values live, show you what each corner is reporting, and perform the level calibration once the new sensor is fitted.
The same calibration is needed after anything that changes the geometry the sensors measure, including suspension work, a strut or spring replacement, and in some cases a wheel alignment. If the car has been fine for years and started sitting oddly after other work, suspect the calibration before the sensors.
The failure Mercedes recalled, and what it feels like
If your car rides harshly rather than sagging, read this before you look at anything pneumatic. NHTSA recall 12V-264, Mercedes campaign 2012070006, covers roughly 3,613 model year 2007 to 2009 E-Class wagons. The connecting rod linking the stabiliser bar to the rear level sensor can seize at its ball head and break.
What happens next is counterintuitive and worth understanding. With the linkage broken, the sensor reports that the car is permanently too low. The system responds by raising bellows pressure and holding it there. Mercedes’ own wording for the result is “uncomfortable and stiff suspension characteristics,” with a loss of air pressure in rare cases. So a level sensor problem can make a car ride harshly rather than sit on the floor.
The dealer remedy is to inspect the level linkage, replace the assembly if it lacks a closed ball head, then check and adjust the rear axle level. Mercedes allowed about 1.5 hours, which is the only published factory labour time we could find anywhere on this system.
The quickest way to tell a sensor fault from a leak
Look at whether the car is complaining. If a corner is visibly low and the cluster is not showing a “Stop Vehicle Too Low” style warning, suspect the sensor or its linkage. The module is not warning you because, as far as it knows, the car is at the right height. A real leak takes the car past the warning threshold and the car says so.
- Sensor reading too high: the system thinks the car is already up, so it will not raise it. The car sits low and does nothing about it.
- Sensor reading too low: the system keeps adding pressure. Harsh ride, and the car may sit high or lopsided.
- Both rear corners down together: on a car with a single rear sensor, that points at the sensor rather than at two air springs failing at once.
- Car rises and then settles again: that is a leak. Sensors do not produce that pattern.
Each sensor contains two Hall effect elements for redundancy, and a fault sets when the two signals disagree. That is why a sensor can be wrong without being dead.
How many sensors, and where
| Chassis | Count | Where they are |
|---|---|---|
| W220 S-Class | 3 | Two front, linked to the upper control arms. One rear, on the torsion bar. |
| W211 E-Class, W219 CLS | 3 | Two front, on brackets linked to the upper control arms. One rear, near the rear left drive axle on the sway bar. |
| W251 R-Class | 4 | One per corner: B22/7 left rear, B22/8 left front, B22/9 right front, B22/10 right rear. |
| W164 ML, X164 GL | 4 | Fronts on the outer side of the strut. Rears attach to the axle. |
Counts confirmed for these chassis only. We could not source a confirmed count for W212, W221, W166 or R230, so check yours rather than assuming.
Fault codes, and a trap in reading them
AIRMATIC uses two different code formats depending on the car’s age, and most code lists online mix them. Look up a code in the wrong format and you will conclude your scanner is broken.
- Older cars (W211, W220, W164, R230): four character C11xx codes. Level sensor faults appear as C1132, C1133 and C1135, each naming a specific sensor. Some lists add C1134, which we could not confirm against a dealer facing source.
- Newer cars (W212, W205, W213, W166, W222): six character codes. Level signal below limit shows as C156784 left front, C156684 left rear, C156984 right front and C156884 right rear.
Whichever format your car uses, the first move on any level sensor code is the same: look at the linkage before you look at the sensor.
Check the linkage before condemning the sensor
These sensors do not sit in the airflow of the road by accident. Each one is mounted to the body and connected to the suspension arm by a small plastic or metal link rod, and that link is the weakest part of the assembly. It becomes brittle with age, cracks, pops off its ball joint or simply disappears, and the sensor then reports a fixed angle no matter what the suspension does.
The symptom is a corner that will not adjust, or a car that slams itself to one extreme of travel. Before ordering a sensor, get underneath with a flashlight and confirm the link rod is present, intact and properly clipped at both ends. Replacement links cost very little compared with a sensor, and on a car that has spent winters on salted roads they are the more likely failure.
While you are there, check the connector for corrosion and the wiring where it flexes with the suspension. These are among the hardest working harnesses on the vehicle, moving through their full travel every time the car goes over a bump, and a conductor broken inside intact insulation will read perfectly until it moves.
A sensor fault is not always the cause of a sagging car
If the car drops overnight or sits low at one corner, the sensors are reporting what is happening rather than causing it. The usual reason is that air is escaping, and the sensors are simply telling the module about it.
Spray soapy water on the air strut bellows, paying attention to the folds where they crack with age, and on the air line fittings and the valve block connections. Bubbles show you where the air is going. Bear in mind that a leak also makes the compressor run almost continuously to compensate, which is what burns compressors out, so finding the leak protects the expensive part too. Our guide to the Mercedes air suspension compressor covers that side of the system in more detail.
One safety point before you work underneath. Never place any part of your body under a vehicle supported by its air suspension. If a line, valve or strut releases, the car drops instantly. Raise it conventionally and support it on jack stands at the manufacturer’s jacking points.
What to do next: compare what the car thinks against what you measure
There are two completely different faults that look identical from the driver’s seat: a corner that really is sitting low, and a corner that is sitting at the right height while the sensor tells the module otherwise. One is an air leak. The other is a sensor or linkage. This comparison separates them in ten minutes and it is the single most useful thing you can do before ordering a part.
- Park on genuinely level ground, engine running, and let the car settle at normal ride height.
- Measure from the wheel centre to the arch lip at each corner with a tape. Write all four numbers down. This costs nothing and it is your reference.
- Connect a scanner, read the suspension module rather than the engine module, and put the live corner heights on screen.
- Compare the two sets of numbers. If the module reports a corner low but your tape says it is level with the others, the module is being lied to, and you are looking at the sensor or its linkage. If the module reports it correctly and your tape agrees it is low, the suspension really is down and you have an air leak, not a sensor.
- Before ordering anything, check the link rod at that corner, as covered above. A detached or broken rod makes a perfectly good sensor report a fixed, wrong value.
- After fitting a sensor, run the level calibration. This is not optional, and an uncalibrated sensor produces the same complaint you started with.
- Clear the codes and drive it, then recheck the live heights to confirm all four now agree with your tape.
The YOUCANIC UCAN-II Pro reads the Mercedes suspension module, shows the live corner heights used in steps three and four, and runs the level calibration in step six. It is available as a seven day rental if this is a one off repair. Coverage varies by chassis and year, so email support with your VIN before ordering and we will confirm your car.
When you do not need a scan tool for this
Steps one, two and five need nothing but a tape measure and a torch. A link rod with its ball joint popped off is visible from under the car and is a common, cheap fix. If you find that, you have solved it without a scanner.
Where the tool becomes genuinely necessary is the calibration after replacement, which cannot be done by hand on these systems.
What the job costs
A caution on part numbers before you order. Two numbers circulate for these sensors, A0105427617 and A0105427717, and retailers list both under names like “headlight level sensor,” because the same Hall sensor body is used for headlamp range control and for chassis levelling. Published fitment for the two contradicts itself on which belongs where, and we could not resolve it from a Mercedes source. Order against your own VIN rather than against a part number from an article, including this one.
For scale, a genuine Mercedes sensor runs around $241 and the OEM supplier equivalent around $90 at a named US retailer. The linkages are cheaper and fail more often than the sensors: the front and rear sensor links are different parts, and the front brackets are separate again.
A ride height sensor is typically between eighty and two hundred and fifty dollars depending on model and whether you fit genuine, and the sensors themselves are usually accessible at the suspension arm with a couple of fasteners and a connector. The labor is modest. What people underestimate is the calibration afterwards, which needs diagnostic equipment and is not optional: an uncalibrated sensor leaves the car sitting at the wrong height, which wears tires unevenly and upsets the headlight aim. A dealer carrying out diagnosis, replacement and calibration will usually be several hundred dollars.
When to hand it over
If the car is sitting on its bump stops or has dropped completely on one corner overnight, the problem is more likely an air leak at the strut or the valve block than the height sensor, and continuing to drive on a collapsed air spring damages the strut and overworks the compressor. If the compressor has been running constantly to compensate for a leak, check it before it burns out, because replacing a strut and then losing the compressor a month later is a common and avoidable sequence. And if the fault returns after a calibrated new sensor, look at the linkage and the wiring rather than fitting a second one.
Frequently Asked Questions
What does the Mercedes ride height level sensor do?
It tells the suspension control unit how high each corner of the car is sitting, so the system can raise or lower it to the correct height.
Can I drive with a bad level sensor?
Usually yes, but the car may sit too high or too low and show a suspension warning. Drive gently and check that the car is not sitting on the bump stops.
Does a new level sensor need calibration?
Yes. After replacement the ride height has to be calibrated with a scan tool, or the car will not sit at the correct height.