

Brake Light Bulb Replacement Toyota Camry 2012-2017 XV50
Is your Toyota Camry’s brake light not working? Learn how to fix the problem by replacing your vehicle’s brake light bulb. This guide is a step-by-step procedure for replacing the brake light on a 2012-2017 Toyota Camry XV50.
How to Replace Brake Light Bulb Replacement Toyota Camry
What you will need
- 7443 Light Bulb
- Fastener remover or Flat screwdriver
Procedure
- Pop up the trunk. Open the driver’s door and pull the trunk release on the left side of the driver’s seat.
- Pull up the trunk lid.

- Remove the push clips on the trunk shield using a fastener remover or a screwdriver.

- Pull out the trunk shield to have access to the brake light.

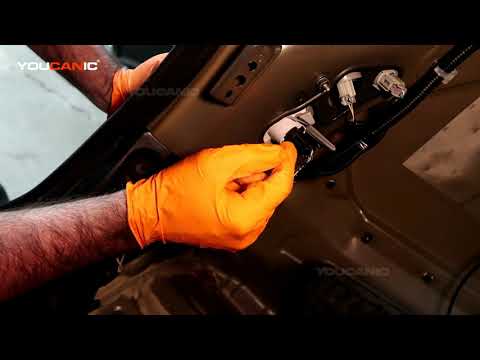
- Locate the brake light and tail light connector on the back of the tail light assembly.

- Remove the connector by twisting it counterclockwise and pulling it out from the tail light assembly.

- Remove the light bulb by pulling it out.
- Get the new light bulb and push it into the connector.

- Line up the connector back to the tail light assembly and twist it clockwise to lock it in its place.
- Align the trunk shield to its original orientation and reinstall its push clips.


We hope you find the Brake Light Bulb Replacement Toyota Camry 2012-2017 XV50 guide helpful. Check these troubleshooting and repair guides for more help on your Toyota.


