

Window Regulator Removal Mazda 3 2013-2018
Do you need to remove the window regulator of your Mazda 3? Follow the steps below to learn how to do so step-by-step on a 2013-2018 Mazda 3.

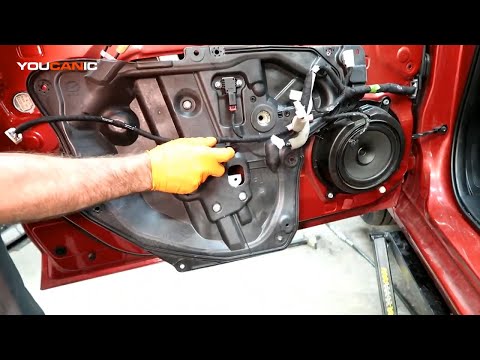
How to Remove Window Regulator on Mazda 3 2013-2018
What you will need
- 10mm socket wrench
- Philips screwdriver
- Mazda 3 Window regulator
Procedure
- Remove the door panel.

Disconnect the electrical connector of the door actuator by squeezing the clip and pulling the connector out.
Remove the bolts on the inner panel using a 10mm socket wrench.
Remove the three screws on the inner panel using a Philips screwdriver.
Remove the 10mm bolt on the door above the inner panel.
Remove the three bolts on the window regulator motor using a 10mm socket wrench. Then pull the motor out of the door.
Go to the backside of the inner panel and pull the window regulator out of the inner panel.

Install the new window regulator in reverse order. For more help, watch the video below.

🔧 Stop paying the dealer for every warning light
Get dealer level diagnostics at home with the YOUCANIC Full System Scanner.
- ✔ Works with all makes and models, including most luxury brands
- ✔ Topology map view shows all vehicle modules on one screen for faster diagnostics
- ✔ Bi directional controls to test fans, pumps, actuators and more so you do not have to guess
- ✔ Special resets and calibrations such as ABS bleed, EPB service, battery registration and more
- ✔ Free lifetime updates with no recurring fees
We hope you find the Window Regulator Removal Mazda 3 2013-2018 guide helpful. Check these troubleshooting and repair guides for more help on your Mazda.


