8 Reasons Why a Car Won’t Start
Your car has been starting and driving flawlessly for weeks when, one day, you get in the driver’s seat, and your car sits there like a potted plant while you beg it to start so you’re not late for work. But, no such luck.
Out of patience and desperation for answers, you go online to find article after article filled with the same vague information. This only tries your patience even more. We’ve all been there, and there’s never a convenient time for your car to break down.
#1 Reason Why a Car Won’t Start
A dead or weak battery is the most common car problem that causes a no-start condition. Even if your lights, radio, and instrument cluster turn on, the battery may be too weak to start the engine. If you hear one or more clicks when you try to start the engine, you most likely have a weak battery, corroded terminals, or loose battery terminals. Even if you think the battery is good, double-check it.
Jump-starting the dead battery will typically be all you need to do to get back on the road. If the car is stuck at home, you can use a 12 Volt Smart Battery Charger to recharge the battery. You can use a jump box to start if the car is stuck in a parking lot.
Thankfully, a no-start condition is generally a relatively easy find and fix! The following table can help you narrow down the problem.
| Problem | Symptoms | Solution |
|---|---|---|
| Dead battery |
|
|
| Weak Battery |
|
|
| Ignition switch |
|
|
| Starter |
|
|
| Fuel Problem |
|
|
| Engine |
|
|
| Electrical Issue |
|
|
For an engine to run, it needs three things: air, fuel, and spark. Therefore, I’m going to break this article down into the three categories you need for a car to start:
- Air
- Fuel
- Spark
Furthermore, we review a few things you can do to test, fix, and repair these conditions.
Before I get into what does what and how to test it, it’s important to have an OBD-II engine scanner on hand. You don’t need an expensive scanner. An OBD-II scanner that costs as little as $15 can read engine codes. Your local auto parts store may also read the codes for free.

For more help, follow this guide to learn how to read check engine codes yourself.
This way, you can follow any codes arising from your no-start condition. This is the most vital step in the diagnostic process. The codes you read may not always solve the problem but can often cut your diagnostic time in half. Often, a code will take you straight to the problem area. All that is left is to complete the repair!
Air
- Clogged air filter
- Bad PCV valve (positive crankcase ventilation)
- Worn, chafed, cracked, broken vacuum lines.
Generally, it is rare for your car to not start because it is not getting the correct amount of air. However, you can do things in your maintenance routine to prevent these conditions from happening.
1. Clogged Air Filter
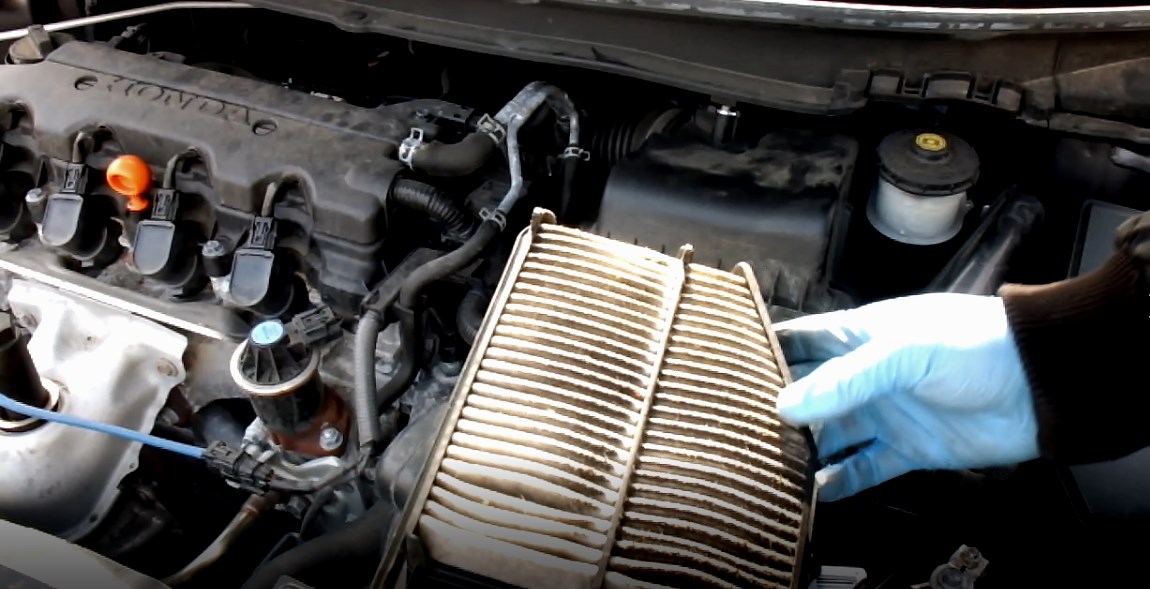
Most vehicles’ airboxes are easy to locate and access. Consult your owner’s manual for recommended service intervals, but you should check your air filter at every oil change. Everything you drive through or around can get into your car’s intake. When checking the air filter, you should look for dust, grime, and pollen buildup.
Another common thing to find within your air filter is bugs and other small critters. Especially if you live in a colder environment and have the potential to find small animals chewing and making nests within your air filter and air filter housing box, not only can this prevent the filter from doing its job, but you could also run the risk of your car’s intake being clogged.
The best way to see how plugged your air filter is is to remove it from the airbox and hold it up in front of a flashlight. Looking through the pleats, you should see a fair amount of light. If you do not see the light in most of the filters, or the light passing through is minimal, the filter should be changed for the best engine performance and fuel efficiency.
2. Bad PCV Valve
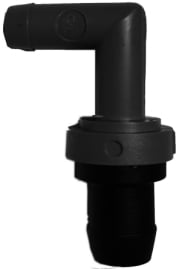
The PCV valve (positive crankcase ventilator) is the most overlooked yet simple maintenance item.
A PCV valve (if your car has one) is a plastic and rubber “breather” located along or near the intake manifold. If your car does not have a PCV valve, it will have a restrictor or vacuum hose completing the same function. Either way, these components can fail and need to be inspected.
The purpose of the PCV valve is to return blowby gases pulled from the crankcase. This improves fuel mileage and makes for a “cleaner,” more eco-friendly burn emitted back into the atmosphere.
For the sake of this article, I will focus on a PCV valve being stuck open. This is the most common failure that would result in a no-start condition.
More specifically, symptoms include:
- Engine misfire
- Rough idle
- Increased oil consumption
- The presence of oil within the PCV valve or vacuum line
- Rough or no-start
Testing the PCV valve is easy and inexpensive to replace if you find yours is the cause of your no-start condition.
- Locate the PCV valve and inspect it for obvious hydrocarbon, oil, or grime build-up. As well as all other vacuum lines connected to or around the PCV valve.
- Let your vehicle reach the operating temperature, then unplug the PCV valve. Place your finger on the end of the PCV valve and feel for the vacuum. If you do not feel a vacuum, there is most likely an obstruction in the breather screen within the PCV valve or the vacuum line.
- If your PCV valve is operating normally, you will notice when you place your finger over it that your engine drops between 40 and 80 RPMs. Then, climb back to normal idle. This dip in RPMS is momentary.
- If your RPMs drop more severely, your engine seems to smooth out, and your PCV valve may be stuck open.
If you find an obstruction in the vacuum line or PCV valve, you can clean this out with a carb cleaner or solvent and use a soft-bore cleaning brush to free the obstruction. However, if the obstruction is within the PCV valve, it is best practice to replace it.
3. Worn, Chaffed, or Broken Vacuum lines
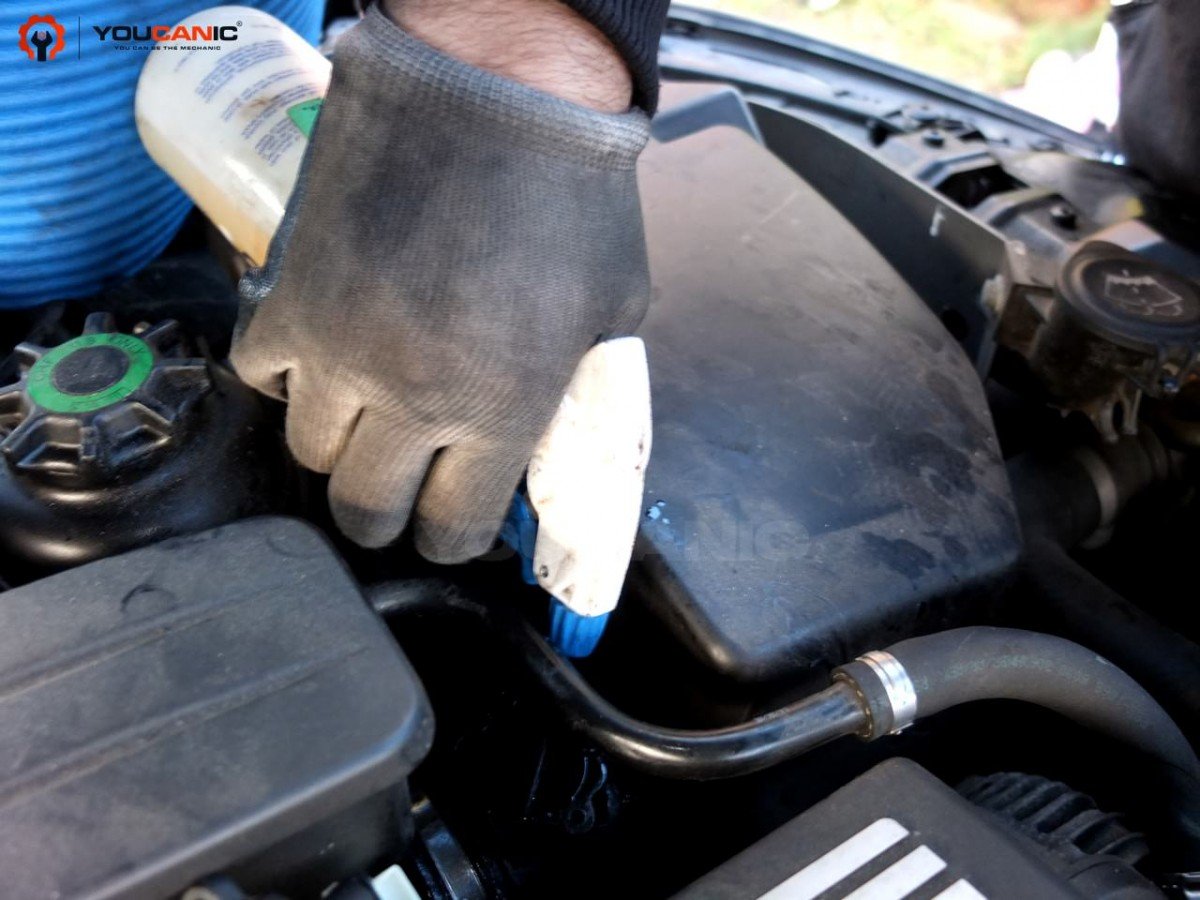
If your car isn’t starting or starting roughly after testing your PCV valve, further inspection of the surrounding vacuum lines is a quick way to eliminate whether or not you have an “air” problem with your car.
The best way is to look for obvious signs of chaffing and cracking. Check areas where hoses may come in contact with the engine block or accessories. The engine’s vibration and driving down the road will quickly cause premature wear, resulting in pinholes in your vacuum lines.
Start the engine and allow it to idle. Spray carb cleaners such as Seafoam near and around the vacuum lines and intake. If you spray near the cracked hose, the engine will react to the spray by increasing the engine idle speed as the cleaner is burned.
Another big factor potentially damaging your vacuum lines is the heat from your engine or other environmental factors, which can cause the rubber and/or plastic lines to dry rot, causing a leak resulting in a loss of vacuum suction.
If you notice that a worn or cracked vacuum line is the culprit for your no-start condition, electrical tape around the hole or crack is a fast fix to get you back on the road until a replacement can be found.
Fuel
- Bad fuel
- Loss of fuel pressure or prime
- Clogged fuel filter or injector(s)
The first condition listed, bad fuel, is a rare reason your car would have a no-start issue. However, this is often overlooked. Especially in colder climates, too much water in the tank can cause a no-start. Not having the correct air, fuel, and spark mixture will not allow proper compression within the cylinders.
A few measures you can take are:
- Make sure you put the correct fuel in the tank.
- If you live in a cold climate, ensure your tank never gets below ½ tank.
- If you know it will be especially cold (in the negatives), treat your fuel tank with a bottle of Heet fuel. This is sold at auto parts stores, most gas stations, and even Box stores.
- If you have a vehicle that isn’t driven very often, ensure that if you live in a climate where the seasons drastically change, you fill the tank before winter in the late fall. Gas stations switch their “summer fuel” with their “winter fuel” in the winter mix; additives often help eliminate moisture.
If you suspect water in your fuel tank, adding Heet to your tank after the fact will eliminate the water and get you started. Make sure you fuel at the nearest fuel station ASAP.
4. Loss of Fuel Pressure or Prime
Fuel pressure or prime loss is probably one of the most common no-start scenarios.
Often, there are warning signs your fuel pump is getting weak before your car doesn’t start.
In the days leading up to a no-start condition, your car may:
- Crank more than usual to get your engine running.
- Your car may also sputter or die under a load (driving up a hill or during acceleration)
- Decreased fuel efficiency
Checking your fuel pump at home is rather easy, and virtually no tools are required.
The easiest way to check the functionality of your fuel pump is to get in your car, shut the door, and turn the accessory on. At this time, you should hear a humming sound. This is the electric priming of your fuel pump. This puts the correct starting fuel pressure on the fuel rail on the engine.
If you do not hear a humming sound, the next step is to open the hood and locate the fuel rail. A Schrader valve is often used on the fuel rail to connect fuel pressure gauges.

At this Schrader, you can again turn on your accessory and then walk to the engine bay. Use a pocket screwdriver or pick to push the Schrader valve down and see if there is fuel on the fuel rail. You can use a fuel pressure test gauge to check the fuel pressure at this valve.
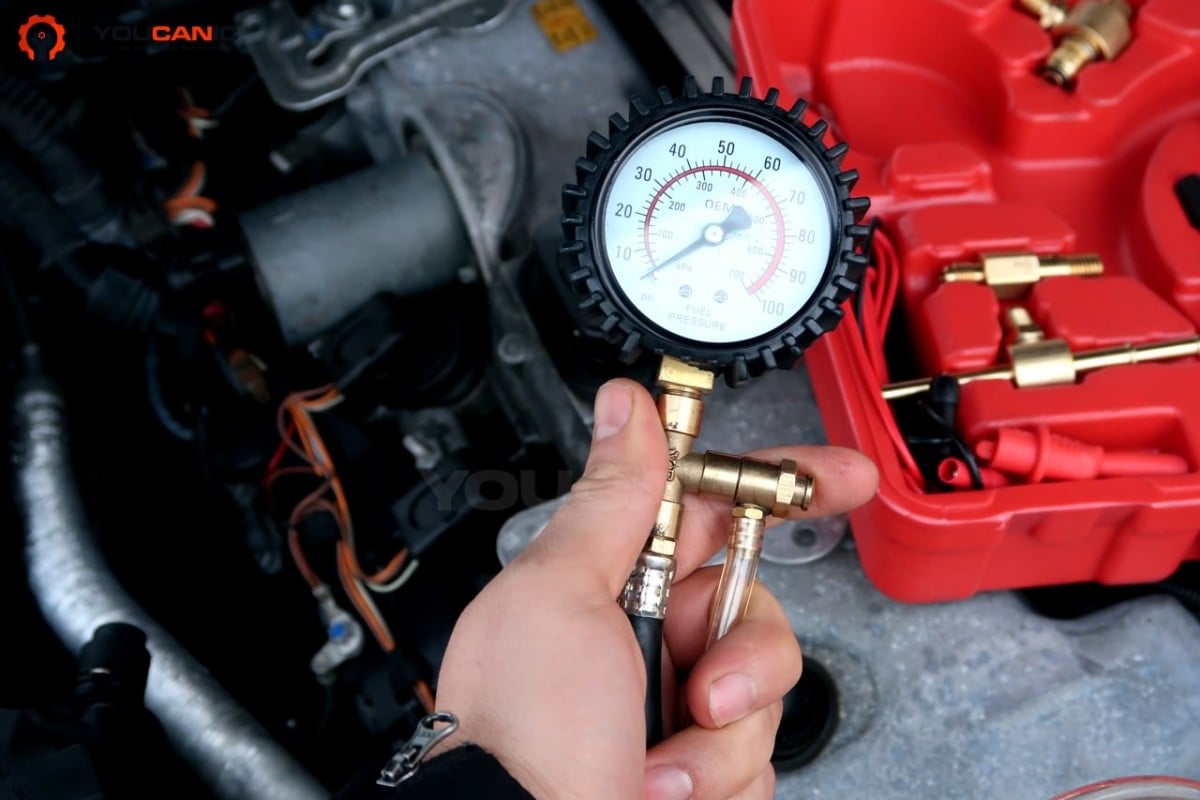
Lastly, check your fuel pump fuse if you don’t hear a humming with your accessory on and/or if you don’t have fuel at the Schrader valve on the fuel rail. Fuses are the easiest first-step diagnostic tests. Typically, fuse panels are under the hood. There is typically a fuse box cover, and under the lid is a fuse legend you can follow to help determine what fuse is where and what amps they are. If this is not on your fuse box cover, there is a legend in your operator’s manual.
5. Clogged Fuel Filter or Injector
As cars age, the fuel filters are often left “unserviceable” and integrated within the fuel tank, one module with the fuel pump. If you have a bad fuel pump, the filter and pump will be replaced at once, and you do not have to worry about separate fuel filter maintenance.
Your fuel filter is typically serviceable and in line with the fuel lines. To find your fuel filter, locate the fuel tank underneath the car and follow the lines (normally fastened to the car’s frame) to the engine. A cylinder-like component is about halfway between the engine and the fuel tank. This is your fuel filter. You can’t always tell if your filter is clogged just by looking at it. But typically, if your filter is clogged, it will show signs of leaking and have a lot of surface rust. These filters are relatively inexpensive and easy to replace.
If you do not have an in-line fuel filter, you may have a cartridge or spin-on filter that can be found within the engine bay. Usually, once you take these off, you should replace them with new ones. So, if you suspect your fuel filter is at fault, replacing it is probably not a bad idea.
There are ways to test if the filter is bad by bypassing it entirely. However, this procedure normally requires more work than it is worth, and itcan take some time to assemble a bypass line. But if you have the time and want the experience, I say, DO IT!
If you have tested your fuel system up to this point and everything seems to be checking out, the last step is to check your fuel injectors. The best and easiest way to test a fuel injector is to unplug each injector from the wiring harness and use your voltmeter on the ohm setting.
TO GET AN ACCURATE, IN-SPEC OHM READING, LET THE ENGINE WARM UP TO OPERATING TEMPERATURE.
If you are experiencing a no-start condition, you want to look for the injector or injectors with an ohm reading that is significantly off from the others.
If you find a clogged fuel injector, you can clean it by removing it from the engine and using solvent and fuel injector tip cleaners to remove hydrocarbons. If your car starts after this procedure, you can buy a fuel injector cleaner and add it to your fuel tank. This additive is designed to help minimize and clear out hydrocarbon build-up. When you test your fuel injector and find that the ohm reading is off from the manufacturer’s specs and the fuel injector does not seem dirty or clogged, your injector is probably a “dead” injector that cannot be repaired. At this time, this injector or injectors would have to be replaced.
Spark

This section is usually the culprit of most no-start conditions. In this section, I will go over:
- Batteries and Battery Cables
- Starter solenoids
- Spark Plugs, Sparkplug Wires, Sparkplug Coils
6. Batteries and Battery Cables
The battery should always be the first place you go when you are in a no-start circumstance. If your vehicle battery does not have enough Cranking Amps to turn your engine over, you may have a dead battery or a bad cell within the battery. Most batteries are non-serviceable; you would generally replace the battery if you have a bad cell.
But, if you left your lights on too long or your accessory on and your battery drained, you can jump your car using jumper cables, another car, or a jump pack. If your car starts with a jump, you’d want to let your car run for 10 minutes to half an hour to let your alternator recharge your battery properly. After your car has run and you feel your battery is properly charged, shut your engine down and try to restart. If your car starts up like normal, you are most likely in the clear.
However, having a car battery charger on hand is good practice. To prevent premature battery failure, let your battery “trickle charge” for a few hours or even overnight.
If you get your car started and know the battery is in good standing but still have issues with your battery “draining,” your car may be experiencing parasitic draw. This can come from any electrical component in your vehicle. However, for this article, bad battery cables could be the culprit of your battery’s draw.
A battery cable goes “bad” when there is too much resistance in the cables, and the energy from the battery is absorbed into the cables. High resistance in battery cables typically comes from corrosion from moisture or kinks or chaffing within the line itself.
This test is easy to do with a voltmeter. Connect your positive meter lead to the positive cable at the battery.
TRY NOT TO GO DIRECTLY TO THE BATTERY-POSITIVE POST. TRY TO MAKE SURE YOU CONTACT THE CABLE END THAT ATTACHES TO THE POS POST.
Then, connect the negative test lead from your meter to the other side at the positive battery cable to the starter. Again, you want the cable contact, not the starter post. Crank the engine, then watch your voltmeter. Your voltage drop should be no more than .25 volts. Before cranking, your meter should read 0v. When you start cranking, if your meter reads more than .25 volts, there is an excessive voltage drop in that cable, and you will need to replace the positive cable. The same goes for the negative battery cable. For this test, you want to place one voltmeter lead onto one end of the battery cable at the starter and then the other lead on the negative battery post. Once again, crank your engine and make sure your reading is as close to 0v as possible. Generally, more than .25v is out of spec.
7. Starter Solenoid
If your engine does not crank, you may have to see if your starter is even operating. When you go to start your car, listen for a click. If you have a click, that generally means the starter is getting the correct voltage from the battery, but the starter motor is faulty. If you’re unsure if you hear the click you need to hear, you can also confirm whether or not you’re getting voltage by placing your voltmeter on the s terminal on your starter solenoid and the ground starter (generally grounded through the starter itself. So, the starter body would be an acceptable place to put the test lead.
Then have someone turn the key for you as if they were to start the vehicle and read if you’re getting battery voltage. If not, you would have a problem somewhere in the starter signal circuit. If you are getting battery voltage, a new starter is probably required for your car to start.
8. Sparkplugs, Sparkplug Wires, Sparkplug Coils
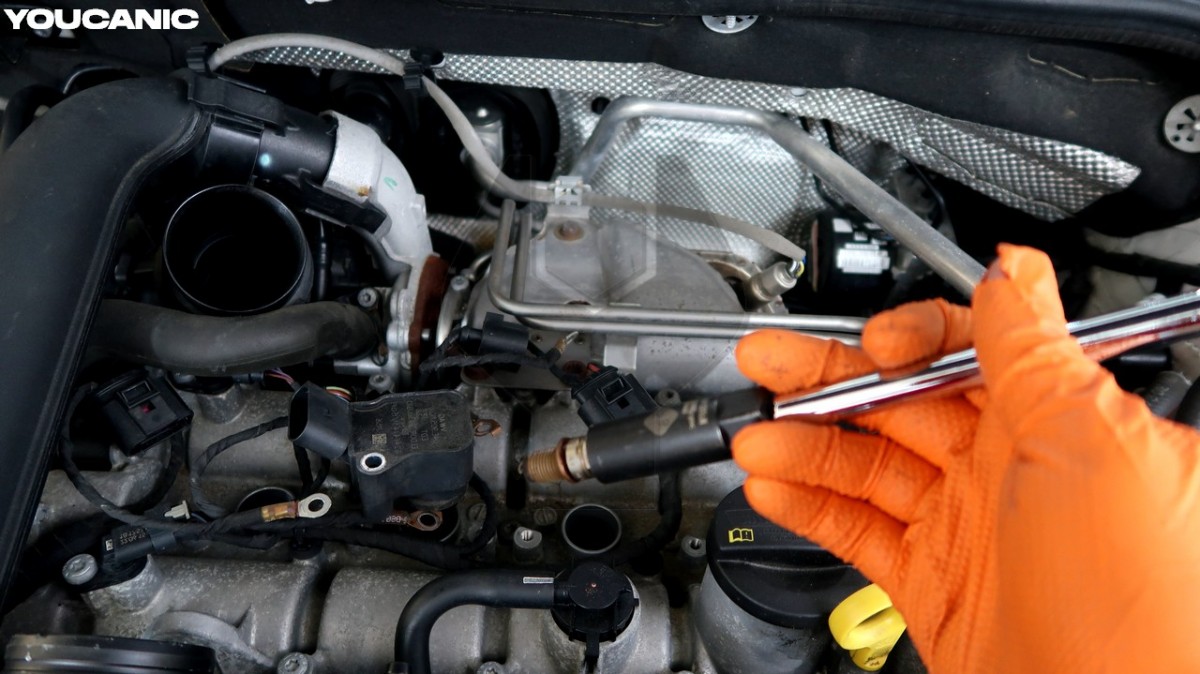
There are many sparkplug testing tools out there, but the easiest way to accomplish this test at home is to remove the sparkplugs from the sparkplug hole and physically inspect them. You want to ensure your electrode is not worn away and has the correct spark plug gap. The spark plug gap is measured with a specific spark plug gap tool that measures the space between the electrode and the metal end just above the electrode, causing the electrical arc.
Spark plug wires should be replaced whenever they are replaced. Like any other hose-like component in the engine bay, spark plug wires can chafe and crack. If your spark plug wires chafe together and arc, the required voltage to the sparkplugs is not reached.
Lastly, this will not be why your engine does not start when it comes to the spark plug coils. Typically, this will cause an engine misfire, decreased fuel economy, and other symptoms similar to faulty spark plugs. Thankfully, testing a spark plug coil on your own is fairly easy. There are tools on the market and ohmmeter readings you can take on the coil. But, when you have a suspected bad coil, the best thing to do is switch it to another coil from a different cylinder. For example, if you have a misfire on cylinder one, you can switch the coil from cylinder one to cylinder four. If the misfire “follows” and goes to cylinder four and is now not on cylinder one, then you can conclude that the coil for cylinder one is responsible for your engine misfire.
In conclusion, there seems to be a lot that causes your car not to start. Hopefully, from this article, you have many questions and further knowledge on what to do if you find yourself in a no-start condition. As you can see, the tests are fairly easy to diagnose and repair all on your own, helping you better understand your car and how it runs and functions.
Once you start the car, you may notice the check engine light. Follow this guide to learn how to troubleshoot the check engine light.
Troubleshooting Car won’t Start.
The YOUCANIC Full System Scanner is a perfect example of an OBD-II scanner for troubleshooting car won’t start. This powerful device can read and clear fault codes from all the systems, perform bi-directional tests, maintenance and repair resets, and many more professional-grade functions that can help you determine the cause of the problem.
Frequently Asked Question
Why won’t my car start when I try to jump-start it?
Make sure that the jumper cables are making good contact. In some cases, the battery may be completely dead and requires charging for 15 minutes before you can start the engine. If using a jump box, make sure it is fully charged.
Why won’t a car start after a jump start?
It is possible that you connected the jumper cables backward. If that is the case, you may have blown a fuse. It is also possible that the main battery is completely dead and needs to be replaced.
Why won’t a car start after sitting for a long time?
The problem is most likely a weak or dead battery. If the car has been sitting for months, you will likely have a fuel-related issue.
Why won’t my car start after the new battery is installed?
Make sure that the battery cables are not connected backward. The red cable goes on a positive (+) post. Also, make sure both clamps on the terminal post are tight. We have seen many cases where an owner installed a new battery but didn’t fully tighten the battery terminals.
The car won’t start, and the brake pedal is hard; why?
It is normal for the brake pedal to be hard when the engine hasn’t started. Once the engine starts, the brake pedal returns to normal operation as the vacuum from the engine makes it easy to apply the brakes.
We hope you find the 8 Reasons Why a Car Won’t Start guide helpful. Check these troubleshooting and repair guides for more help on your vehicle.





(No subject)
What a great article. It is full of helpful information. Great job with writing it Brandy!
(No subject)
Great tips! Thanks for sharing.